Friday, November 29, 2019

Wednesday, November 27, 2019

Hanging Ornament Boxes

Hello, everyone!

It's Nancy here with you today...sharing two fun Christmas ornaments.
I have used both the
Snowflake Mittens Hanging Ornament Box,
and the Christmas Star Hanging Ornament Box

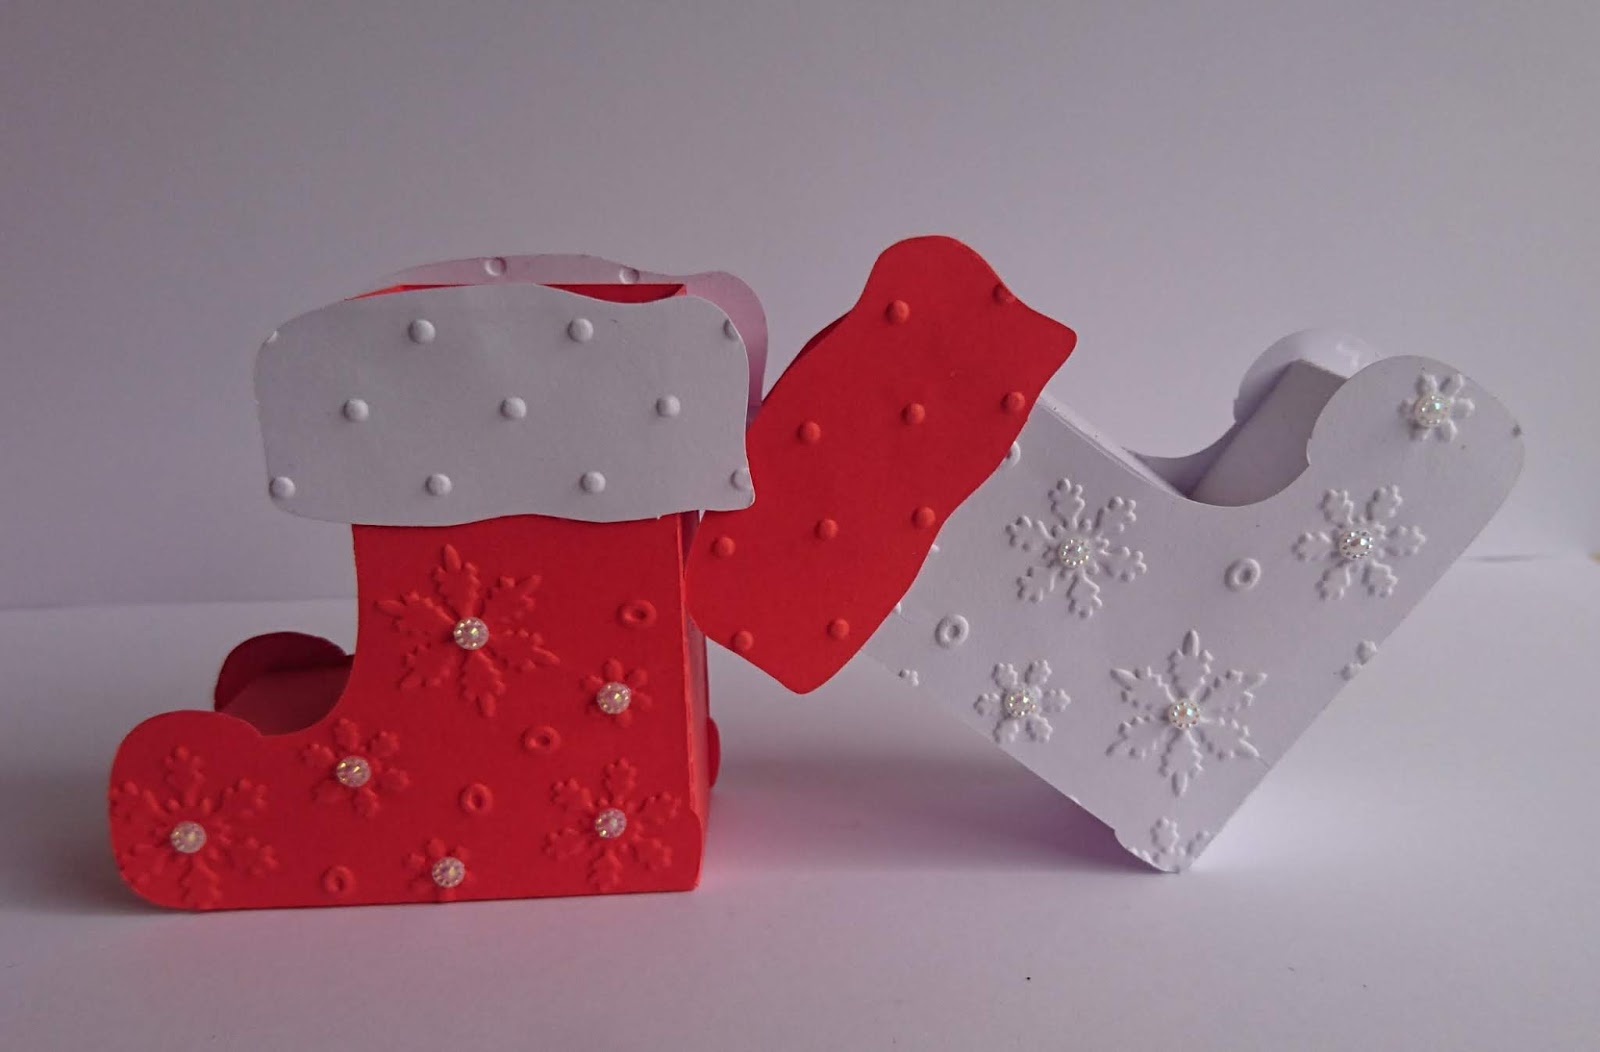
We'll begin with the cute Mittens one:


Isn't that cute? 
The photo below shows all the cut pieces.


It's such a cool design, and really easy to put together.
You begin by adhering the sides and the bottom of the box.
Then you adhere the red mittens to the insert piece,
and then adhere the mitten cuffs in place on the red mittens.


Next, you slide the insert into the box, and slip the sides into the slots.
It's almost finished already!
Now all you have to do is adhere the top flaps in place, over the loops.


I really like how the insert sides poke out of the box sides.
I used the red snowflakes that were cut out of the mittens
as extra embellishments on the box.


Here's the back of the ornament.
It looks exactly like the front!


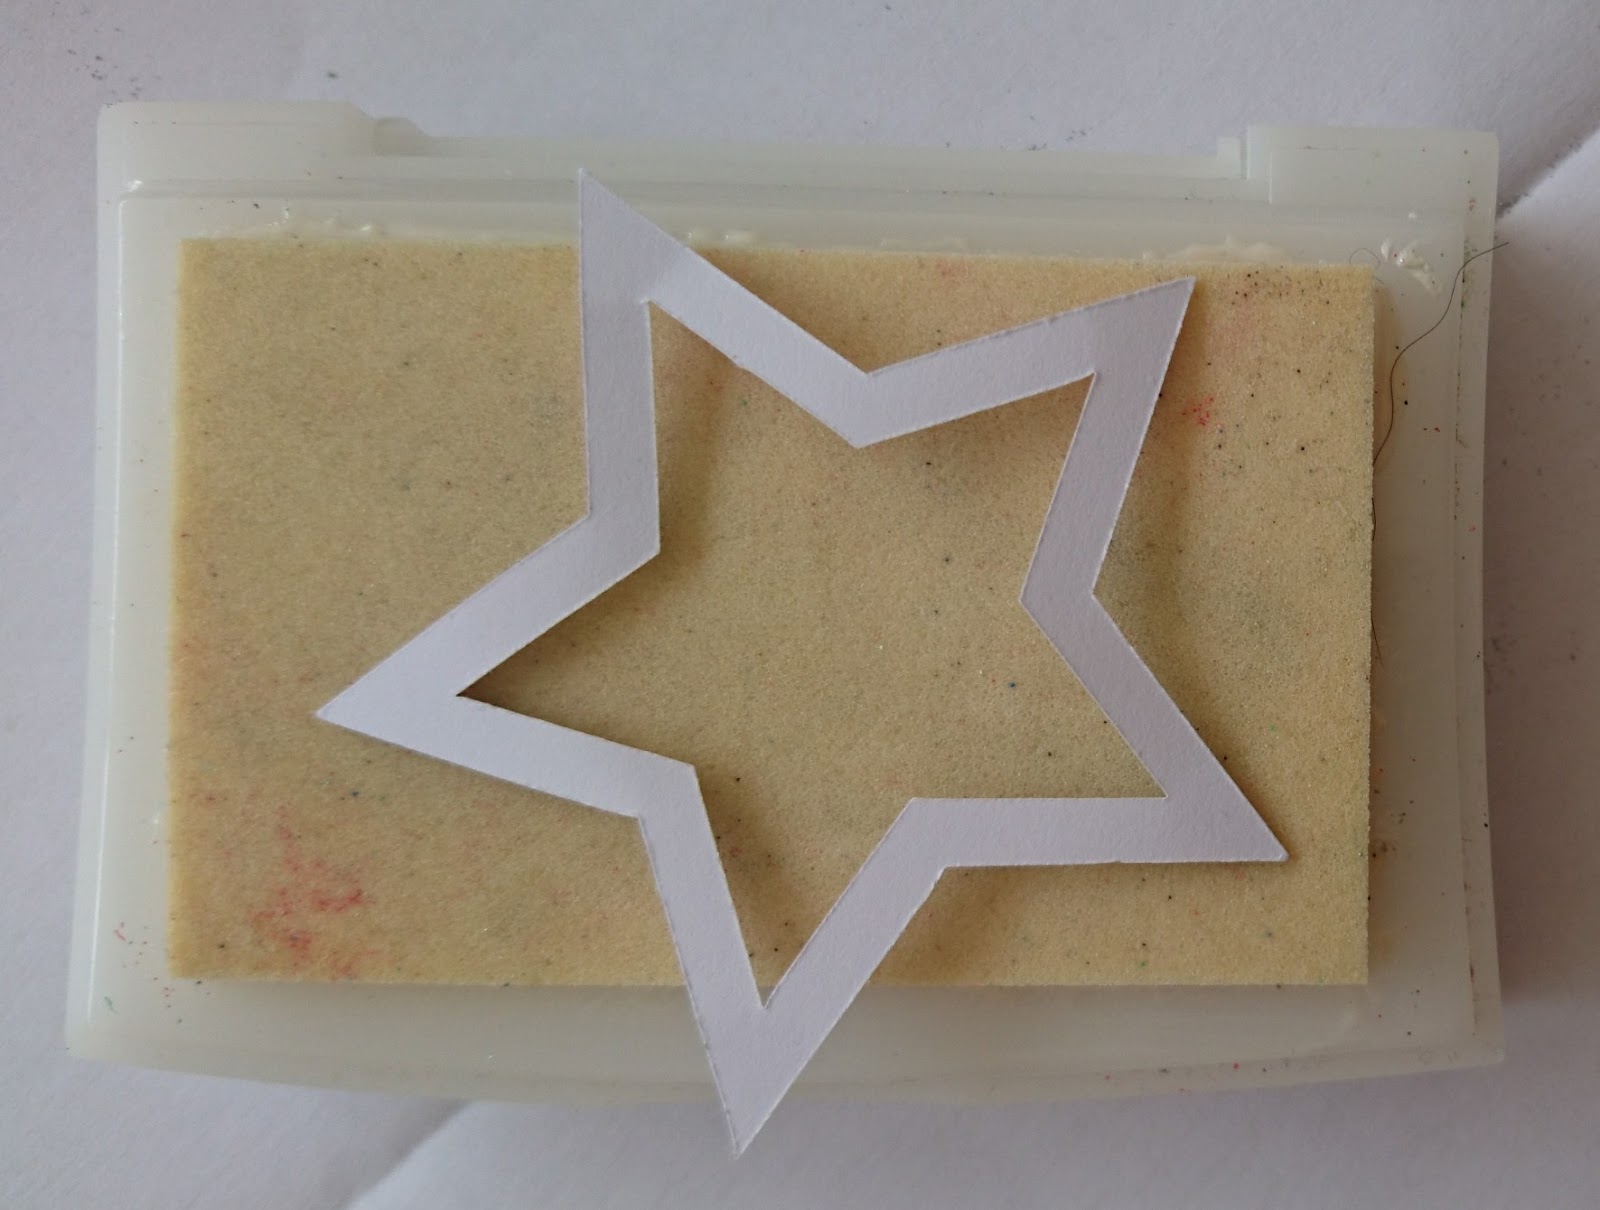
Now here's the Christmas Star Ornament:


I went a different way with the paper choices on this one.
I thought the star paper, and the shade of green would work perfectly with the fabulous new
Acanthus Teal Gilding Powder.


This Ornament Box is put together the same way as the last one.
It has a star layer, which I heat embossed in Acanthus Teal,
before adhering it in place on the insert.


The lovely embossing turns this into a very elegant Christmas Star Ornament Box!


Quietfire Design Products Used:


Other Materials Used:
Papers: Pebbles - Home For Christmas,
Craft Smith - Homemade Holiday;

* * * * *

Thanks so much for stopping in today!
I hope you got some good ideas for how to use these fun files for yourself!


See you again soon! :o)

Monday, November 25, 2019

Assembling the 3D Oval Hanging Ornaments

Forest Deer 3D Oval Hanging Ornament

These ornaments are really easy to cut and assemble and just a little bit different with a scene or character on a little platform to give it dimension! There is a series of them, so check for the others for more cuteness.  Here is how you make your own.

Ungroup all the elements and separate out the different colours.  Cut all the elements (there aren't many in most of these ornaments!

Fold the tabs in opposite directions.

Fold the standing elements back to back and apply a small Glue Dot at the top to hold them together.  Some designs (like Santa) require layering of elements on the free standing elements.


Create the platform by perfectly layering the two discs, with the "snowy" white one on top.  This helps make it a little more sturdy.


Use Glue Dots on the bottom of the standing elements to attach them to the platform.


Apply Glue Dots to the tabs on the ornament base and place the platform on them by aligning the trees with the sides of the ornament base as shown below.

Winter Cabin 3D Oval Hanging Ornament

Enjoy creating your own 3D Hanging Ornament!
Please ask if you have any questions!
Happy creating, Suzanne


Santa 3D Oval Hanging Ornament

Nicolas´ Boot


Hello digital friends!

On December 6th we celebrate St. Nicolas´ Day. Children place their boots outside the house in hope Nicolas will fill them with sweets and nuts. Some parents fill real boots, others use plastic or paper ones. I chose "Santa´s Boot Box" from Suzanne´s digital collection. The file includes a mistletoe, which I didn´t cut.

On the mat

White and red were the colors of my choice.


Once cut you can start by folding all perforated score lines upwards on the boot box. Next, you apply adhesive to all the tabs. If you start by folding the large boot back flap in place the construction will be more obvious. (I have done serverak boots and it doesn´t really matter where you start, you always end up with the boot :-)

I decided to emboss the sides (snowflakes) and the fur (dots). 
To give it a shimmery look I attached some rhinestones. 


Fill with chocolate and nuts.


Happy cutting!
Kora


Friday, November 22, 2019

Quick Clips-Periodic Table Candy Cane/ Chocolate Calling ATC Gift tags/ Print and Cut

Hi Y'all 
Robyn here with a 15 minute project!
My gift tags are getting more interesting than my gifts!

And right now in the Silhouette Design Store
 the Candy Cane file is free with a purchase!
Check out the entire line of Periodic Elements.
Perfect for your lover of science! 
and candy and chocolate!
Add this to t-shirts, mugs, totes and even use it as wall art! 

On the Mat

On the Mat


ATC sized

Print and cut and go!


Supplies:

Wednesday, November 20, 2019

Flourished Snowflake Star Tree

Hello, Connie Nichol here today with a scrapbook layout featuring the Flourished Snowflake Star Tree cut file available in the Silhouette Design store here. It's a beautiful little cut file that would make a great front for a Christmas card, or in this case, a great embellishment for a scrapbook page.  The snowflake is a separate element from the tree, so you can cut lots of extra snowflakes.  Decorate your tree with glitter glue, gems or pearls.


The Merry Christmas title is cut using Quietfire Design metal dies although similar digital options are available in Suzanne Cannon's designs in the Silhouette store.


Christmas is only 35 days away and I know that Rusty will be ready to help decorate once again.  Capture those memories and enjoy the season!  

Quietfire Design Supplies Used:  Merry Christmas 2 die, Flourished Snowflake Star Tree digital cut file

Other Supplies:  cardstock, Ranger Perfect Pearls glimmer spray and Stickles glitter glue, Kaisercraft red pearl stickers, sewing machine, cardboard, black pen. 


Saturday, November 16, 2019

Quick Clips - Bat Advent Calendar


Hello crafty friends!
I had the children pick the motive for this year´s advent calendar (seems like we cannot leave Halloween behind).

This is a combination of two cutting files:


Have a happy Saturday!
Kora


Wednesday, November 13, 2019

Christmas Star Hanging Ornament Box


Hello everybody!

Christmas is approaching rapidly and you all are probably already busy with preparations. I am so in love with the hanging ornament boxes because you can use them for decoration on the Christmas tree or in a window. But you can also give them to friends as a little present.

There are many different ornaments you can choose from, I went for the 

On the mat

all cut


To add some extra glimmer to the star I decided on gilding it. I chose 
and


Isn´t it amazing how the Gilding Powders add this unique shimmering look to the project? 

When all is done it´s time to assemble the box. You can find a video tutorial here.


Thanks for stopping by today! Have a great day!
Kora