Wednesday, March 28, 2018

Easter Bunny Baskets

Hello, Connie Nichol here today with some adorable Easter Bunny baskets that I whipped up with Suzanne Cannon's electronic cutting file available in the Silhouette store.  It was so quick and so easy I made a bunch of them.  I cut my first few with cardstock but much preferred the baskets I made with two sided patterned paper. 

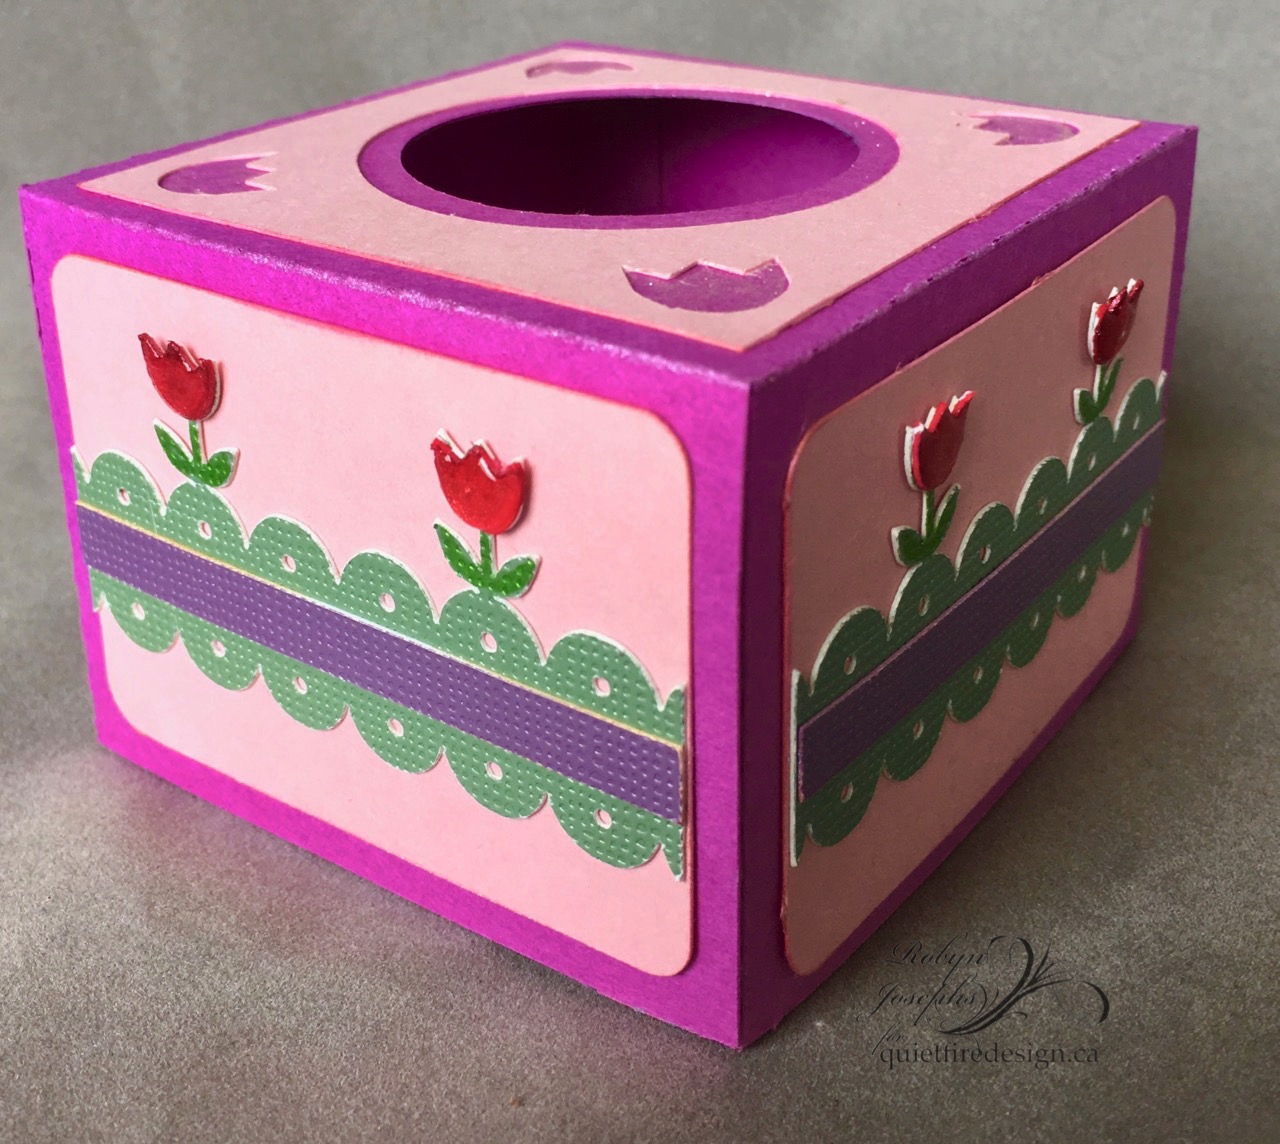
These would be perfect to adorn your Easter dinner table.  Make a basket for each place setting out of different pastel colours and then put in a few chocolate eggs (or even a hard boiled egg).


Here's what the cut file looks like - only two pieces - fold the box up on the score lines and attach the handle.  Adorn with bunnies as desired.  The bunnies would also make an excellent border on a card or scrapbook page (note to self for a future project).


Happy Easter everybody!  May your day be filled with chocolate eggs and a delicious Easter dinner.


Wednesday, March 21, 2018

Easter Tulip Lantern-15 Minute Wonder

Hi y'all!
Robyn here today with an
Easter miracle.
Yes you can make this as a last minute gift in only 15 minutes 
and
it's currently on sale in the Silhouette Store!

On the Mat

You can watch an assembly video
(only the holiday has been changed!)

Folds flat for mailing.
Only one piece!
and looks lovely with a battery votive light inside.
Additional bunnies optional!


To visit artists all around the world, (and see these in their native setting) please hop over to
WOYWW
Comments and questions welcomed!

Wednesday, March 14, 2018

Tulip Easter Egg Holder / Easter Egg Holder Bunny Style-15 minute wonder!


Hi Y'all!
Robyn here
 with a Egg display project plain and fancy!
The bunnies box can be done in 15 minutes! I timed it!
The tulips do take a bit longer.
Egg design by my afterschool kids!
They give new meaning to create without limits!
All files can be found in Suzannes Silhouette Store
There are several more styles so you will just have to hop ever there an take a peak!

On the Mat


On the Mat


Get hopping  on your digital crafting!
To see what's on my desk and other's world wide, please visit
WOYWW
Comments and Questions Welcomed!


Wednesday, March 7, 2018

Flourished Shamrock - Atomic Lucky - ECD Friend - May Your Longest List - Side Easel


Yogi here today and it's almost time for St Patrick's Day...

I'm using a stamp that was meant for Christmas... but with a little masking it's now good for any time of the year. How many stamps or dies do you have in your stash that you only use for what they were originally meant for?? Why not look at them again and see what you can do with them - you'd be surprised...

I'm using an A Way With Words dies  "Friends"  from Elizabeth Craft Designs, also available on Quietfire Design HERE

I'm also using a quote and sentiment stamps from Quietfire Design  ("May Your Longest List at Christmas..."); ("You Are..." 5pce set)

Also using a couple electronic cut files from Suzanne available on Silhouette. Click image to purchase. 


  and the digi paper available from Suzanne on Quietfire Design 

http://www.quietfiredesign.ca/Lucky_Shamrock-Scrapbook-Paper-Digital-Papers.html


Opened the two Silhouette files. Decreased the size of Lucky to 6.5"w. Cut from white cardstock and colored while on my mat with various distress green pads. Removed from mat and embossed both shamrocks using Emerald Creek "Green Sparkle" embossing powder. Clear embossed the tiles for Lucky. Mounted the tiles onto a dark green cardstock and trimmed down.

See template image at right to create the card structure. I used a 12"w light green Bazzill Monochromatic cardstock cut to 5"h. Scored and folded at 7". Then scored diagonally across the 5" section
.


Fold the "A" over and use it as the template to cut a front piece the width of the card and diagonally to the diagonal score line. Image above card template image on template. Adhere to front of card.

Using my Tim's Stamping Platform, stamped the "You Are So" using Versafine Black Onyx and clear embossed.

Adhered the "lucky" strip on the bottom and them the flourished Shamrock of the edge of the fold.

 
On the floor: Printed out the digi paper of the smaller shamrock pattern, trimming down and adhering to floor.

Again used my Stamping Platform, masking of the "Christmas" words and stamping using the black. Stamped the bottom part of the quote onto tracing paper and repositioned my card and stamping. Clear embossed the quote.

Scored the shamrock and adhered to floor to act as my stopper.

Die cut the Friends, fussy cutting the "s" off... inking with a green pad and embossing with the green sparkle embossing powder.

Raided my stash for the letters for "My" (Elizabeth Craft Designs "Upper Case Alphabet")