Wednesday, December 26, 2018

Butterfly Flourished Heart - Valentine - In A Perfect World - Easel card


Yogi here today and Christmas is over at last... and I thought I'd work on the next significant card making event - Valentine's.

I'm using a quote and sentiment stamp from Quietfire Design ("Calligraphic Love Bits" 5pce set); ("In A Perfect World..." 4pce set)

And am using a couple of Suzanne's electronic files available on Silhouette onLine store. Click images to purchase. 


https://www.silhouettedesignstore.com/designs/50365?search=suzanne+cannon+hugs&sortby=relevance&submitted_search=truehttps://www.silhouettedesignstore.com/designs/179785?search=suzanne+cannon+butterfly+flourished+heart&sortby=relevance&submitted_search=true
Scored, and folded my red textured cardstock to create my easel card structure (card size: 7"w x 5"h). Cut another piece from the red same size as card, adhered to front.


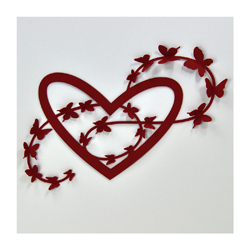
Opened SCAL (Sure Cuts A Lot software) and the Heart Butterfly Flourish file. Removed the card base image. Increased size of Heart/Butterfly to 6.7" x 4.5". Selected all and copied/pasted a 2nd image on my mat.


Opened the "Hugs" and increased size to 5"w x 1.9"H. Copied and pasted and selected "Shadow" style.

Cut everything from white cardstock. removed one of the Heart/Butterflies from the mat, cut away the butterfly flourish (keep for later) and inked the heart with Archival "Vermillion" ink pad, clear embossed. Set aside.

Colored the butterflies using Faber Castell Pitt pens and cut away from the vine.

On the other Heart/Butterfly colored the butterflies with the same colors as above. Adhered the cut away butterfly - bodies only. Using an embossing pen, inked the wings only and embossed with Emerald Creek Iridescent Shimmer embossing powder.


Adhered a piece of white "Coral Reef" paper to the card front and then the Heart Butterfly Flourish. 


On the floor:

Inked the "Hugs" using Versafine "Toffee" and embossed with Queen's Gold embossing powder. Inked the shadow layer with the Vermillion and clear embossed. Adhered both layers together and inked with Versamark and clear embossed (this gives a shiny layer to the gold layer and helps adhere the two layers together. Score and adhere to floor to act as a stopper.

Stamped the "Valentine" and the quote on white cardstock using Versafine Black Onyx and clear emboss. Sponge some Distress "Fired Brick" around edges and adhere to floor.

Add some flourish pearls


Wednesday, December 19, 2018

Nutcracker Sugarplum Fairy Ornament

Hi Y'all
Robyn here with a special gift for any 
Sugarplum faerie in your life.
This tiny dancer is one of Suzanne's Nutcracker Series


On the Mat

The Quietfire Design stamp on the tag is


and the snowflakes


Vision of sugarplums abound!
Comments and Questions Welcomed


Wednesday, December 12, 2018

Snowman Gift Card Holder

Hello, Connie Nichol here today with a cute gift card holder created from a Suzanne Cannon cut file and a Silhouette Cameo.  The cut file is available in the Silhouette Design Store here.  Gift cards have become such a ubiquitous part of our lives and it is nice to make them a little bit special by giving them in a personalized card holder.  These snowmen are so quick and easy to put together.  You can cut them out of regular cardstock in a variety of colours, or try specialty paper like I did here to make them a little fancier.  The shiny blue and silver on these holders was cut out of mirror cardstock by Crafters Companion. 


These are just a couple of ideas on how to customize your snowmen - try cutting them in different colours, add a bit of glitter paper, the sky is the limit.  They will make your gift cards look adorable.  Merry Christmas! 

Saturday, December 8, 2018

More Home Decor!

Just because Advent has begun, doesn't mean you can start now!  Here is my favourite Advent creation (so far!).  It's called the Advent Tree - Boxes with Gift Drawers


Fill this awesome advent tree with gifts and/or treats for family, friends and guests! Even better, make an Advent Tree for someone else. How about just making one with a chalkboard label so you can change the date manually? This file comes with all the pieces you need to construct the little drawers, but also the numbers to cut and print!  You can make all the "boxes" the same or mix and match.  You don't need to stack the boxes in the shape of a tree, you can leave them cached around the house to be found on just the right day!

In addition to these boxes, you can find two more styles on the Silhouette site which you can mix and match with these boxes!

 I’ve given you all the numbers, the extra box (for making the Advent Tree) and an extra bird so you have more options.
I’ve given you all the numbers and the extra box (for making the Advent Tree).

Happy decorating!!
Suzanne

Friday, December 7, 2018

Christmas Home Decor


Here is one of my favourite pieces of home decor.  I love the elegant flourished deer, cut in gold cardstock atop the rustic plank! 
You can find the deer cutting file at Silhouette HERE
and on the Quietfire site as an svg HERE 
 
The wood plank is by Jillibean and measure 6x6" (I made this last year, so not sure if this is still available!)

Happy decorating!
Suzanne

Wednesday, December 5, 2018

Free cut file!


Snowfall Stencil Pattern

To celebrate being featured by Silhouette on their blog this week, I created a sweet little Snowfall Stencil Pattern file!  It's free to download until December 13, 2018. Wanda used it to create this wonderful snow flurry Let it Snow card.  You can read all about how she used it and more on Quietfire Creations HERE.
Enjoy your free file!
Suzanne

Nativity Hanging Ornament Box- Suzanne Cannon Featured Designer-15 Minute Wonder!

Hi Y'all!
Robyn here,
Excited to be posting for
Featured Silhouette Designer
Here is another in the Hanging Ornament series.
Bet you can't make just one!
All the inserts are interchangeable with the box.
There are only two pieces, and if you don't get carried away with embellishment, 
this ornament can be made in 15 minutes!
(Yes I timed it!)


On the Mat


Scroll down the Blog for others in the series:

Christmas Tree Hanging Ornament

Christmas Star Hanging Ornament
Enjoy choosing your designs, creating and gifting!

Comments and Questions Welcomed

Tuesday, December 4, 2018

Silhouette Spotlight!!

I am so honoured!  Silhouette chose to spotlight my page in the Design Store.  You should see the projects they created with my designs.  Simply fabulous!  Here is just a teaser.


See the whole article HERE on the Silhouette 101 blog!
Many thanks to Yuliya at Silhouette for putting it all together!

Wednesday, November 28, 2018

Music Dingbat - Christmas Wreath - Merry Christmas - Music Exresses - Easel

Yogi here today and I wanted to do something musical with Suzanne's latest Music Dingbat font...

Also using a quote and design element background stamps from Suzanne available on Quietfire Design  ("Music Expresses"); ("Merry Christmas Background"); ("Grid Background")

I'm also using several digital cut files from Suzanne available on Silhouette onLine store. Click images to purchase. 


https://www.silhouettedesignstore.com/designs/279850?search=music+dingbat&sortby=relevance&submitted_search=truehttps://www.silhouettedesignstore.com/designs/51599?search=holly+twig+berry+wreath&sortby=relevance&submitted_search=truehttps://www.silhouettedesignstore.com/designs/52025?search=Suzanne+Cannon+Merry+Christmas&sortby=relevance&submitted_search=true

Scored and folded my dark grey toned cardstock to create the easel structure. Cut another piece from a matte silver cardstock same size as card and adhered to front.

 
Opened my SCAL software (Sure Cuts A Lot) and created the musical background using the Music Dingbat font. Made sure everything touched something and then cut from white cardstock. Inked with Distress Black Soot Oxide pad. Doodled with a silver gel pen on the large treble clef.

Cut the white 1/2" wide frame, same size as card front and embossed with Cuttlebug "Swiss Dots" embossing folder. Adhered the musical notes and frame to the front, some under the frame and some on top of it.

Stamped the quote using Versafine Black Onyx and clear embossed. Die cut with Elizabeth Craft Designs "Stitched Circle" die set. Adhered to edge of frame front.


On the Floor: stamped the Grid pattern on an angle twice on white cardstock using my Tim's Stampin' Platform with Black Onyx and clear embossed. Trimmed down.

Stamped the Merry Christmas background on white cardstock with Distress "Pumice Stone" and embossed with Silver Detail embossing powder, then electronically cut the Merry Christmas. Also cut a shadow layer and inked with the Oxide black. Adhered both together then onto the grid background.

Cut the holly and berry branches from white cardstock, inked with oxide pads and adhered to floor. Adhered everything to floor with 3D foam tape.

Final touch added Liquid Pearls "White Opal" and Red" to the berries.


Monday, November 26, 2018

The Nutcracker Ornament Decorations

Charmed by the Nutcracker Ballet?  Me, too!  So here are some of the characters as ornament decorations.  They come with a hanger and a tag, but you don't have to use them.  It's up to you.  Change the colours around to please yourself, there are no rules!  I made the snowflakes from vellum which doesn't show up here, but is really nice "in person".  These are all available on my Silhouette profile today!

Shown here:
Nutcracker Ornament Decoration   Design ID 281553
Nutcracker Clara Ornament Decoration    Design ID 281555
Nutcracker Mouse King Ornament Decoration   Design ID 281556  
Nutcracker  Snow King and Queen Ornament Decoration    Design ID 281554 
Nutcracker Sugar Plum Fairy Ornament Decoration   Design ID 281557

Let the holiday season begin!
Happy cutting! Suzanne

Wednesday, November 21, 2018

Christmas Tree Hanging Ornament

Hi Y'all Robyn here!
Happy Thanksgiving all US of A friends!
Over eating and full speed ahead on Holiday decor and gifts.
Ornaments are a thing in our family and our family is a tribe.
Mindful of that I can't get too carried away unless I start the year before!
(note to self for next year!)
After the initial planning, this series of ornaments by
can be made in about 1/2 hour.
If they're not worth a half hour, take them off your list!
The  inserts are interchangeable with the holder and you can see
many more designs in the store.
Y'all come back Dec 5 for multiple posts as 
Suzanne will be a featured designer!

On the mat

 The holder

The insert
(forgive the smudges and dust-polish your metallics before you photo and gift!)


No one in our tribe has a small tree!
#OrnamentsMatter!

Comments and Questions Welcomed!

Tuesday, November 20, 2018

QFD Advent Fonts!


Fun QFD Advent Fonts using the extra colour elements.

Have  you met the Quietfire Design Advent Fonts?  They're a fun way to decorate on the countdown to Christmas!  You can use just one font, or mix and match!  Why not make them into stickers?


Here are the fonts available to date.  They're all available at Silhouette HERE!

Quietfire Design Advent Fonts at Silhouette

Each font should be treated like a dingbat font - A=1, B=2,  Y is 25 and Z is the quotation. To access the extra elements, use the extra keys noted with the font. If you want to use the extra elements in the Silhouette software, place them over their corresponding image in the monogram, rightclick and choose Send to Back of Layer or Send Backward. Check out the video on layering additional elements on YouTube: https://youtu.be/Vre31ZfSPwY and a tutorial about mixing and matching the QFD Fonts can be seen here: https://youtu.be/B6CHIk9Tmyw  (this one is using the fonts in a Word Document).

When you print these fonts large, they make great colouring pages!


If you have any questions, just ask!
Happy printing and Merry Christmas! Suzanne

Wednesday, November 14, 2018

Snowflake Christmas Cards

Hi, Connie Nichol here today with a couple of simple Christmas cards featuring the Noel Snowflake card digital cut file available in the Silhouette Design Store here.  I didn't end up using the 'Noel' part of this cut file, but the card base with the cut out snowflakes is the perfect beginning for many different Christmas cards.  You can add any die cut word or stamped sentiment and here's a couple of examples.  You might have noticed that I'm still on a white and gold kick.  There is something just SO elegant about gold on any project.


Here's what the cut file looks like - not the best photo of a computer screen, but you can see the card base with the itty bitty snowflakes, as well as the ovals and the word Noel.


I found that cutting the card base out of a solid colour of cardstock worked best to show off the cut out snowflakes.

I added a gold border to the Merry Christmas card by rubbing embossing ink along the card edges (use a scrap piece of cardstock as a mask to keep a sharp edge), sprinkling with embossing powder and heating.

Quietfire Design has a number of dies and stamped quotes that fit perfectly into the cut oval frame of the cut file.  The small Merry Christmas and To Appreciate the Beauty of a Snowflake stamps are the two that I reached for.  Thanks for stopping by, Connie