Showing posts with label Kora. Show all posts

Monday, November 25, 2019

Nicolas´ Boot


Hello digital friends!

On December 6th we celebrate St. Nicolas´ Day. Children place their boots outside the house in hope Nicolas will fill them with sweets and nuts. Some parents fill real boots, others use plastic or paper ones. I chose "Santa´s Boot Box" from Suzanne´s digital collection. The file includes a mistletoe, which I didn´t cut.

On the mat

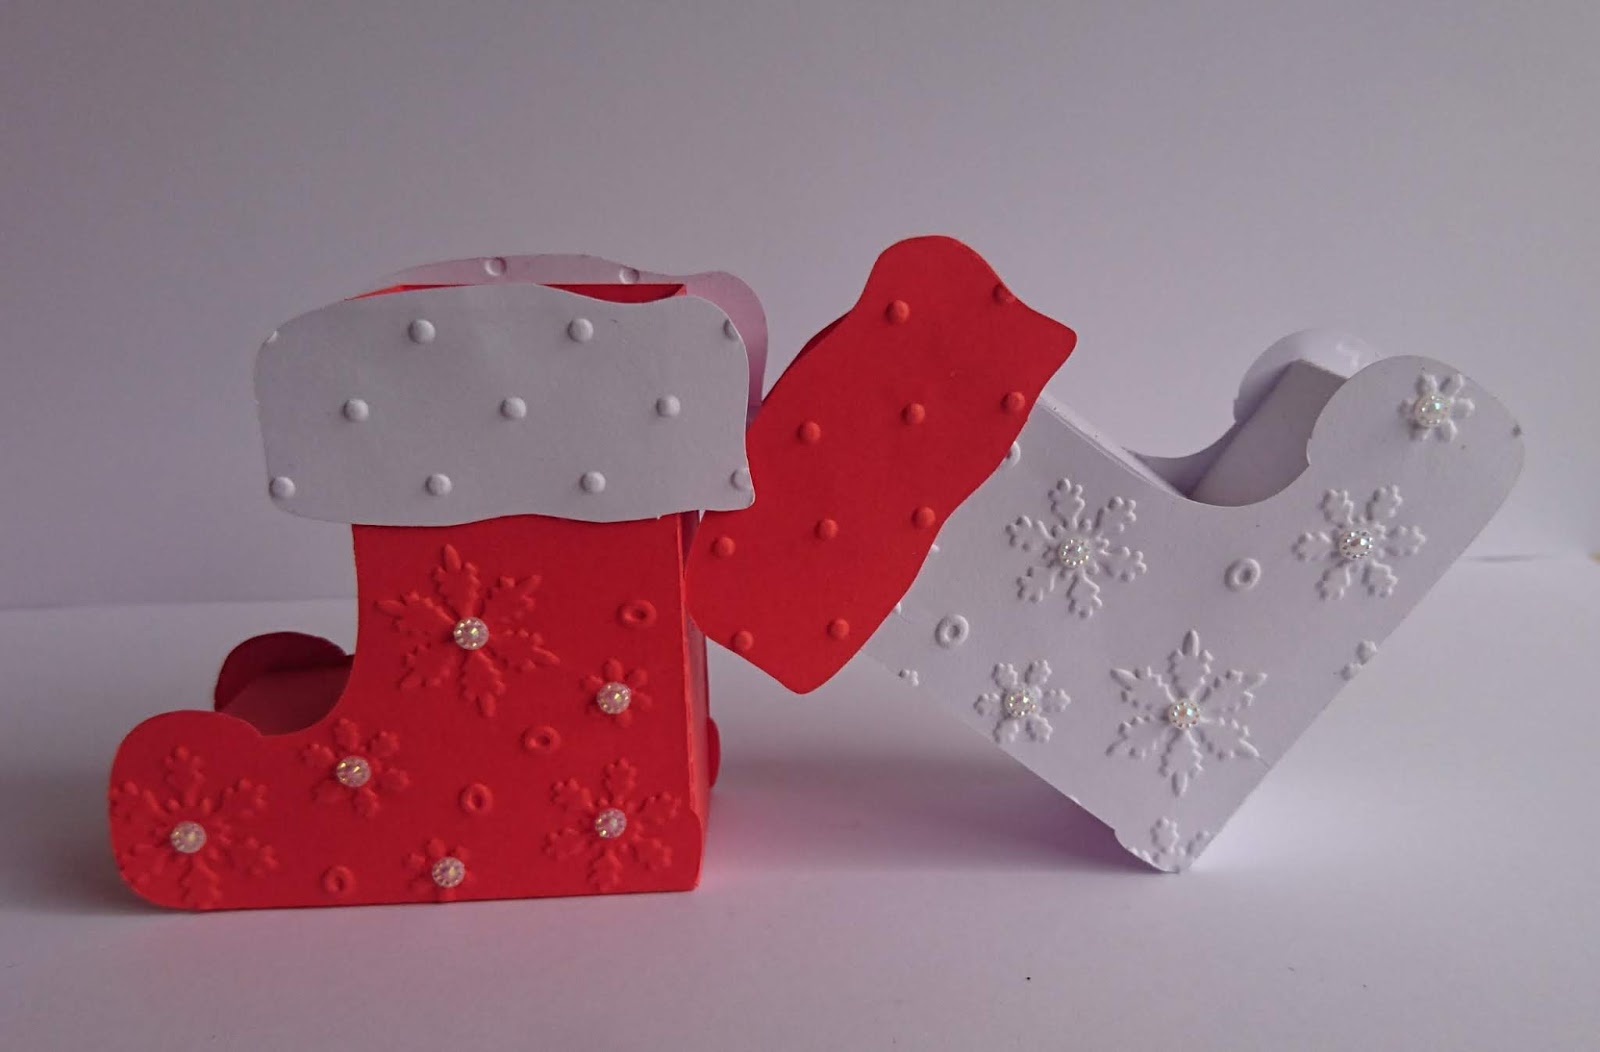
White and red were the colors of my choice.


Once cut you can start by folding all perforated score lines upwards on the boot box. Next, you apply adhesive to all the tabs. If you start by folding the large boot back flap in place the construction will be more obvious. (I have done serverak boots and it doesn´t really matter where you start, you always end up with the boot :-)

I decided to emboss the sides (snowflakes) and the fur (dots). 
To give it a shimmery look I attached some rhinestones. 


Fill with chocolate and nuts.


Happy cutting!
Kora


Monday, October 14, 2019

Kitty with Moon


Boooo! 
Hello, my friends!

Halloween is approaching rapidly and I was in need of some decoration. The Kitty with Moon is an easy and fast project and looks good in a window or, as in my case, on the front door.

Open the file "Kitty with Moon" and ungroup the elements.


Once you have cut the elements you can put them all together.


I love the fine details of the cat and the bats.


When all is done you simply have to decide where to put your decoration. I thought it would look good in a window, but my son wanted to put it on the front door - so that´s where it is now.

Happy Halloween!
Kora


Wednesday, October 9, 2019

Maple Tree - Four Seasons


Hello, crafting friends!

Fall has arrived. The leaves are turning red and yellow. I love this time of the year when every tree and every leaf is bright and colorful. The Maple Tree digital cutting file fits just perfectly for the season. The file can be adapted to any season though, as you also get snowflakes. 

Once you have cut all the elements it´s time to assemble them. Make sure you cut many leaves, you will need a lot to cover the whole tree.


I love the extra elements that come with the file (swing and bird).


I added some butterflies using the QFD Butterflies and Stars Sprays Metal Cutting Dies.

Cut the butterflies, take the "negative" and put it onto the card.

Then take the cut butterflies and put them back into the negative (use glue).


When finished you can take the negative off. The butterfly spray now sticks to the card. Add rhinestones if wanted.


Have a happy and COLOURFUL fall! 
Kora


Monday, September 23, 2019

Quietfire Quick Clips - Ribbon Gift Box


Hello, digital crafting friends!

If like me, you are a craft supply hoarder, you probably have many ribbons lying around. These go perfectly fine with the Ribbon Gift Box.


Materials used:
pink and violet heavy cardstock
ribbons 
embellishments

If you need a taller version of the gift box, you can find the cutting file here:

Happy crafting! 
Kora


Monday, September 16, 2019

Bébé/ Baby Stroller Card


Hello crafty friends!

Kora here again with another fun project: a baby stroller card I made for the newest addition to our family - little baby girl Sophie. I combined the digital file: bébé / baby stroller card with some dies.

First of all, I cut all the different elements using heavy cardstock (violet, pink and light yellow).

After putting them all together I added some rhinestones and a few hearts I cut with the 

Hearts & Pawprints Sprays - 2 Metal Cutting Dies

The baby stroller put together and decorated with some rhinestones.

For the inside of the card I decided on stars using these two dies:
Flourished Night Sky - Metal Cutting Dies

Butterflies & Stars Sprays - Metal Cutting Dies

And -of course- I again added some rhinestones.

Happy crafting! Thanks for stopping by! 
Kora


Wednesday, September 11, 2019

Best Sister


Hello digital friends!

Kora here again with a birthday card. It was my sister's birthday at the beginning of September, so I needed a card. The file comes with "best sister" or "best brother" :-) You can find the digital cutting file here

on the mat

 Best Sister cut 

I wanted to add some extra effect to the card so I decided on embossing the best sister lettering with red embossing powder.


The best sister lettering now has a wonderful shimmering look.

I chose a patterned paper (different shades of red) to mat the lettering. And of course some rhinestones. 


Thanks for stopping by. Have a great day!
Kora


Monday, August 19, 2019

Back to school


Hello, my crafty friends!

Kora here today sharing the school cone I made for my son. It will be his very first day of school in just a few days. For this special occasion, the children are given school cones. They are made out of heavy cardstock and may be filled with a lunch box, pencils, crayons, a little toy and also some sweets. As I have a big bat lover here at home, I decided on putting some bats on the cone. As well as pencils, some stars, and his name.

All of the files are Quietfire Design Monogram Fonts. You do not need a cutting machine for those, they will work just fine with eg Word. 
Fonts I have used for this project:


After printing the desired letters & shapes, I colored the pencils and did a scan and cut.

The pencils on the mat

Bats, stars, pencils and the dragons with letters

When all is cut you can adhere it to the cone.


I added some pencils to the top


In the end, I glued the dragon letters to the cone.

Thanks so much for stopping by today!