 |
| Forest Deer 3D Oval Hanging Ornament |
These ornaments are really easy to cut and assemble and just a little bit different with a scene or character on a little platform to give it dimension! There is a series of them, so check for the others for more cuteness. Here is how you make your own.
Ungroup all the elements and separate out the different colours. Cut all the elements (there aren't many in most of these ornaments!
Fold the tabs in opposite directions.
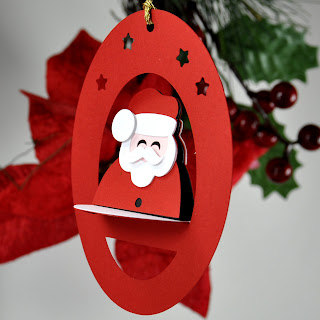
Fold the standing elements back to back and apply a small Glue Dot at the top to hold them together. Some designs (like Santa) require layering of elements on the free standing elements.
Create the platform by perfectly layering the two discs, with the "snowy" white one on top. This helps make it a little more sturdy.
Use Glue Dots on the bottom of the standing elements to attach them to the platform.
Apply Glue Dots to the tabs on the ornament base and place the platform on them by aligning the trees with the sides of the ornament base as shown below.
 |
| Winter Cabin 3D Oval Hanging Ornament |
Enjoy creating your own 3D Hanging Ornament!
Please ask if you have any questions!
Happy creating, Suzanne
 |
| Santa 3D Oval Hanging Ornament |


Will they fold flat for mailing? They are very cute!
ReplyDeleteI’m so pleased you like them! You might be able to persuade some of them to fold flat, but they weren’t designed with that in mind! <3
ReplyDeletewhat size do you use
ReplyDeleteHi Juanita! It depends on which one you choose! Please contact me through my website and we'll get it all sorted out!
Delete