- Silhouette Digital files-Garden Letters Mini Booklet Album #329436
- Poppies Pot Card in a Box #328489
- Coneflower Pot Card in a Box #328488
- Sunflower Filled Lantern #328955
- Cardstock
- Adhesive
- Decorative thread for binding
- Tapestry needle
- Imagination!
Quietfire @ Silhouette Design Store
Tuesday, October 13, 2020
Garden Letters Mini Booklet Album with Pop up
Tuesday, September 15, 2020
Watercolored Autumn Filled Mandala Pumpkin Card
Hello! Kim here today! We are just days away from officially moving from summer to autumn, but here in Alberta there is no denying the seasons are switching! I have a bit of a love affair with all things autumn, and have been secretly celebrating it’s arrival! Today’s project share does just that!
Tuesday, August 18, 2020
Halloween Card Using HALLOWEEN TREE CUPCAKE BOX
I pulled the design into my Design Space, I use a Cricut Maker.
Next I hid all the elements I did not require. This left me with the tree, owl, bat, cat and part of the box. Using my software I grabbed a square and used the “slice” feature to remove the box. If you are not sure how to do this, it is just as easy to cut the entire piece and cut using scissors. I cut two identical images.
My background and moon were layered using some gel prints I had previously made. I can get lost in that process and just save all the prints for use in cards, journals and scrapbooks.
I took one of my images and sliced off the owl, cat and bat with scissors.
I embosses these parts using Quietfire Design Gilding Powders in Copper Scroll and Gothic Black. I like the extra texture it adds when adhered to the full cut image.
As a finishing touch, I used the Quietfire Design stamp, Something Wicked, with Gothic Black Gilding Powder to add my sentiment!
I finished the card with some littles eye details using a Dylusions Paint Pen and some purple washi tape. I can’t wait to send it off to someone this coming October!
Wednesday, March 4, 2020
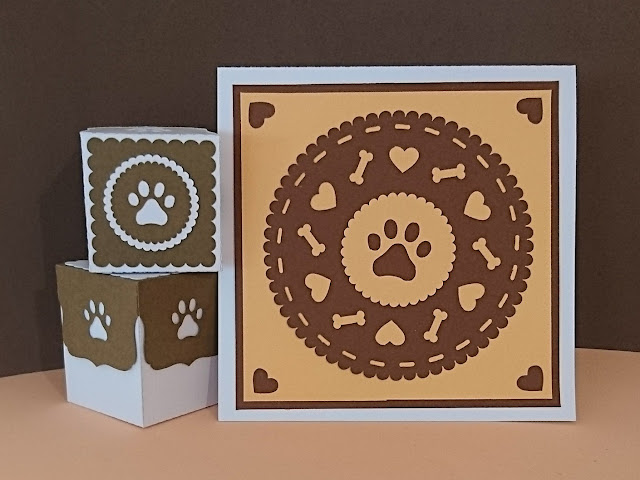
PUPPY DOILY CARD
Wednesday, February 19, 2020
Valentine Tower of Love Treat Dispenser-Not just for V-day!
Monday, February 17, 2020
Making the Quietfire Fun Flowers
Meet the Quietfire Fun flowers! These flowers are so pretty and simple - they aren't supposed to look like any real flower, but they're fun and so cheery to add to a gift or just have on a table or window ledge.
The Fun Flowers are available on my Silhouette site here: http://bit.ly/2oAR9e6 (if you make a purchase by using this link, I *might* get a small commission!)
You make them by rolling the petal strip. Watch this short video for the details. Happy creating!
(if you are receiving this as an email update, please click on THIS LINK to view the video on YouTube or see it on the blog)
Thanks for watching!
Suzanne
Monday, January 13, 2020
Making the Left-Center-Right 3-Letter Monogram Fonts
You may find something different online and you can adjust your monogram to whatever format suits you. A classic monogram font is created using your
first name initial on the left,
middle name initial on the right and the
last name initial larger in the middle.
the Right Flourish Monogram Font (E).
If you're creating a monogram for a married couple, their last initial goes in the middle (larger), the bride's first initial to the left and the groom's to the right. For instance (oh, this is tough! Most of my friends kept their maiden names!) .... When George married Martha, this would have been their monogram (made in the colours of her geraniums!):
To create our 3-Letter Monogram in Silhouette Studio:
You will need the three fonts:
- Type out the first letter, highlight it and use the drop-down menu to choose the QFD Left Flourish Monogram Font.
- Separately type out the middle initial, highlight it and choose the QFD Middle Flourish Monogram Font.
- And lastly type out the right initial, highlight it and choose the QFD Right Flourish Monogram Font.
- Once you click off these they become objects, so you can align them.
- Click the middle initial and enlarge it to the size you want.
- Now move the other two initials closer so the flourishes overlap until you like the look of the monogram.
- Group all the letters together and enlarge to the size you need. Of course, add some colour! All the letters can be the same colour, or they can all be different!
- You can print them, just like this in a frame of your choice, or weld them together and cut out the detailed 3-Letter Monogram!
- Warning - it's like eating chips. It's really hard to stop at one!
Wednesday, January 8, 2020
Valentine Album Notebook Card
Robyn here!
- Silhouette Store file-Valentine Album Notebook Card #31198
- Emerald Creek Modern GildingPowder- Dragon Berry
- Cardstock
- Adhesive
- Yarn for binding
- Needle for binding
Friday, December 20, 2019
Assembling the Treat Dispensing Christmas Tree Decoration
 |
| Treat Dispensing Christmas Tree Decoration |
Love how this little tree-shaped decoration with the pull-down drawer mechanism turned out! It's ready to dispense a holiday treat! The Treat Dispensing Christmas Tree Decoration design can be found at the Silhouette Design store HERE.
Here is how you assemble it:
Fold all the perforated score lines up, flip over and add adhesive to all the tabs as shown.
Begin assembling the box....
Flip over.... Keep going!
Cut the little drawer covers in your choice of colours and add them to the front of the pull down drawer.
Assemble the boxes in a tree shape. Add ribbon pulls to each drawer.
Fold the star and adhere back to back at the top. Apply the on-lay in your choice of colours.
Fill and enjoy!
Suzanne


