Monday, August 5, 2019

Meet Twinkle, the Elephant (Gift Card Box)


Hello my friends!

I came across this sweet little elphant a while back. My cousin is going to have another baby by the end of summer, so I decided to make this gift card box for her and the baby. As we don´t know if it´s going to be a boy or a girl (surprise, surprise), I chose a neutral colour that will fit both. I decided on different shades of yellow heavy carstock, because this is a bright and cheery colour. 


After I ungrouped and cut the elements I added some embellishments to the banner, the wheels and the eye. 


When all is done you can assemble the elements. You can find a tutorial on assembeling the Quietfire gift card boxes here. There is a video tutorial online too.

the box

 the layers inside the box 


Thanks so much for stopping by! Have a great summer! Kora


Wednesday, July 31, 2019

Sunflower pillow gift box and ATC

Hi Y'all!
Robyn here with a quick and easy
pillow box project perfect for any occasion you want to 
present a small present!
The box is one simple piece
and you can make the sunflower plain or fancy as you wish.
On the Mat


I made duplicates of the sunflower pieces to create an ATC.
This could become a gift card, a Brave Girl Card or even a birthday card!
What do you think?
I'll post it on the Suzanne Cannon Fan Group 
Facebook page and look for your comments!

Files and Supplies
  • Sunflower Pillow Gift Box #29841
  • Tim Holtz Kraft Core Nostalgic Collection-paper
  • Glue dots, Tombow mono multi glue
  •  Double sided tape
  • Distress ink-mustard seed, spiced marmalade
  • signo uniball gold pen
  • Silhouette Cameo 2


Wednesday, July 24, 2019

Lighthouse, Flip Flops, Beach Ball & Pail Summer - In Summer The Song - Thinking Of You - Easel card


Yogi here today using a bunch of summery files from Suzanne that were meant to be frames... But heck when do I do what's supposed to be done....

I'm using a couple rubber quote/sentiment stamps from Quietfire Design ("In Summer the Song..."); ("Thinking Of You small")

And I'm using 3 Silhouette files from Suzanne. Click on images to purchase 

https://www.silhouettedesignstore.com/designs/297258?search=lighthouse&sortby=relevance&submitted_search=truehttps://www.silhouettedesignstore.com/designs/297264?search=lighthouse&sortby=relevance&submitted_search=truehttps://www.silhouettedesignstore.com/designs/297264?search=lighthouse&sortby=relevance&submitted_search=true 

Cut, scored and folded my white cardstock to create the easel structure. Cut another piece same size and adhered to card front. Cut a piece of Dark Blue Ruche heavy paper and adhered to card front. Cut a piece of white cardstock and adhered to card front.


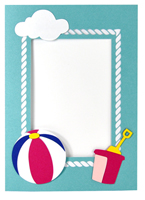
Opened SCAL (Sure Cuts A Lot) and the 3 beach scenes. Ungrouped and separated them putting the lighthouse, rope frame and beach ball on a 2nd page. Color printed it out on white cardstock then fussy cut around the images. Yes I know you can print and cut, but since it was eons since I last did that I couldn't remember how to do it. and since I'm probably not going to use it for another eon... I was too lazy to figure it out...
Cut all the elements on page 1 below and while on my mat colored the various pieces. Inked the clouds with Versamark and embossed with Emerald Creek "Soft Fallen Snow". Adhered my lighthouse, clouds and seagull to my card front.

Stamped the quote using Versafine Clair "Morning Mist".

On the floor: Adhered a piece of beige Ruche heavy paper. It has a texture like wavy beach sand.

Adhered the beach ball and pail, scoring them to create my stopper. Scored a little section of the flip flops and adhered them as well.

Stamped the sentiment onto white cardstock using Versafine Clair "Twilight" and clear embossed. Cut it in an oval shape and sponged some Distress "Faded Jeans" around the edge.


Monday, July 22, 2019

Birthday Banner Card


Hello digital cutting friends! 
My kids seem to be invited to a birthday party every other week. I like to personalize cards, so I decided on using the QFD Birthday Banner Monogram Font. I printed the initial of the birthday boy´s name, coloured the banner and did a scan and cut.


I decided on a blue background to go with a yellow card using heavy cardstock.


To make it look more cheery and happy I added ballons
Make sure to cut many different colours and sizes.


Adhere the ballons to the left and the right side of the card. You may also add some other embellishments like rhinestones or pearls et voilá you have a finished personalized birthday card. 

Happy crafting!
Kora


Saturday, July 20, 2019

Quietfire Quick Clip *Sunflower Tote*


This tote is made to be filled with chocolate and will be given to my neighbour for his birthday.
You can find the cutting file here.


Have a sunny day! 
Kora

Wednesday, July 17, 2019

There is nothing Wine won't cure - Wine Time Monogram Font - Wine is sunlight

Hi Y'all! Robyn here
Still in Wedding Mode!
My almost DIL loves all things wine
so my next gift will be adorned with this tag.
Quietfire wise, it uses digital cuts, print and cuts, digital fonts and stamps!

Two of Suzanne's Digital files 
On the Mat


Working Mat

  • Separate the tag  from the tulip box file- size to fit a wine bottle
  • Turn on registrations marks for print and cut- be sure your design is inside of the marks
  • Move Wine sentiment into the tag and size
  • Choose the Wine time font and select letters
  • Move Jillian name to the tag and space and size
  • Print and cut
  • Color and embellish!


The stamp


The ribbon was on their wedding invitation!
Charms? Why not!

Create and drink responsibly!
Please share your creations with us in our FB group.

Comments and Questions Welcomed!