Showing posts with label Happy Birthday. Show all posts

Thursday, March 9, 2023

Dingbat Stencil Fonts-Patterns and Garden-Happy Birthday Card

Hi Y'all!

Robyn here welcoming you to unlimited possibilities with Pattern and Garden stencil fonts!
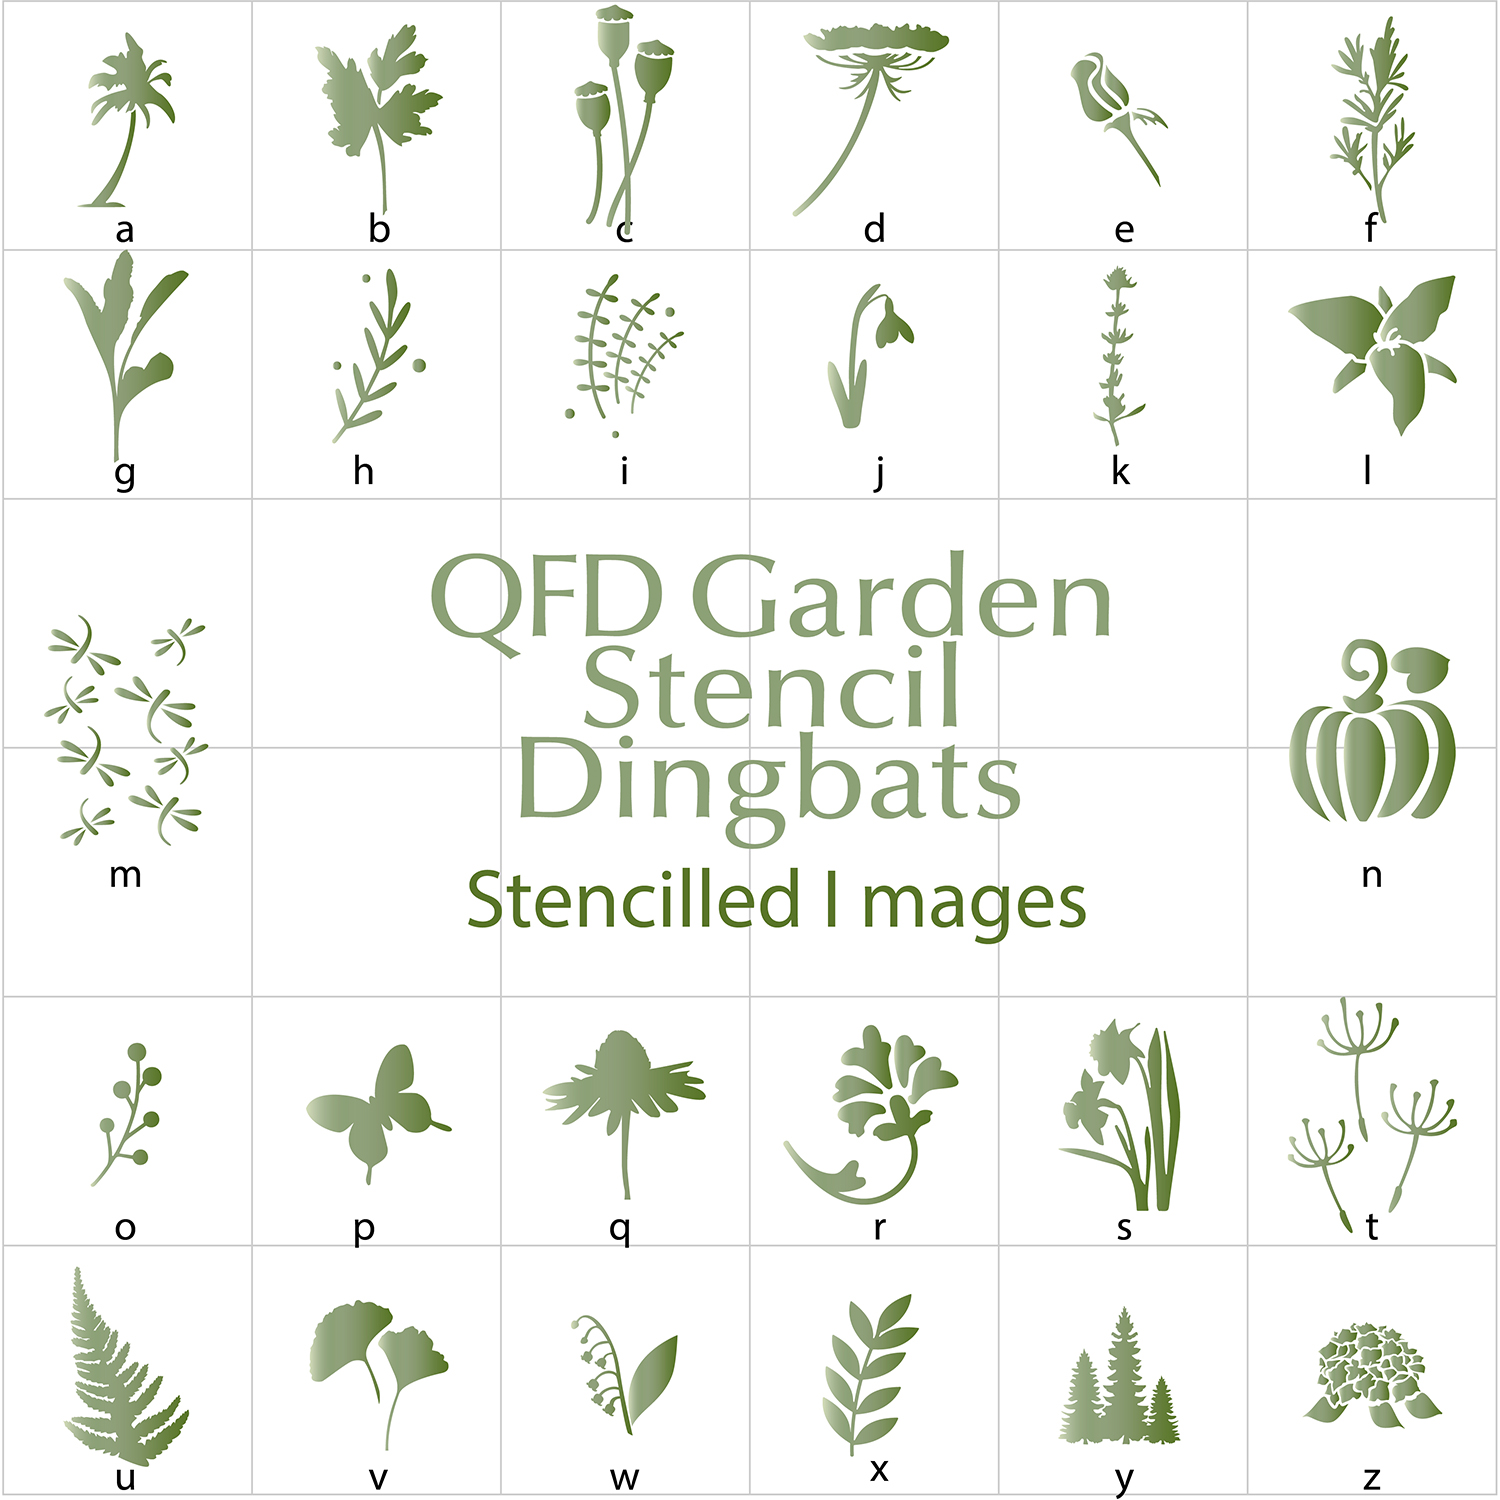
One font file gives you 26 options!
On the Mat
Garden Stencil Dingbat
Pattern Stencil Dingbat


Using the Pattern "d" as a stencil and Garden "s" as a die cut I created the cuts needed for the card. 
Working Mat
"d" stencil
"s" daffodil cuts
Any sentiment from Suzanne's design store can be added to any occasion.

Supplies:
  • Silhouette Design Store files- QFD Pattern Stencil Dingbat Font- #433558
  •                                                  QFD Garden Stencil Dingbat Font- #433556
  • Cardstock
  • Adhesive
  • Paint and ink for stenciling and coloring cuts
Please enjoy all the possibilities and permutations of these fonts!
Share your creations with us at the
on Facebook.


Wednesday, July 20, 2022

Happy Birthday Stencil Card

Hi Y'all!
Robyn here with a birthday card for almost anyone, and the front panel is also a stencil!
Created this card for a 90+ year young friend! 

Four easy pieces!

What you need to know is this is a lot of cutting.
Be patient.
If you are having difficulty getting a clean cut
  • Slow down the speed
  • Make sure the mat is clean and sticky enough to hold paper firmly
  • Use a clean brayer to firm down the paper before cutting and before removing the panel
  • Shorten the blade depth and make 2 cuts
Adhesive dot sheets make it easy to attach the busy panel

Supplies
Comments and questions warmly welcomed.
Join us at
on FB
for more inspiration and support and fun!


Tuesday, September 21, 2021

Happy Birthday Balloons Shaker Card


Hi, there crafty friends!

How have you all been doing? Here is a Happy Birthday Shaker Card. Suzanne shared the technique on Facebook Live a couple of months back and I just love it, because it´s 1) so easy 2) has a real "wow" effect.

Materials I used:
card base (white)
card base (motive paper "happy birthday")
violet cardstock
transparent sheet
double-sided adhesive tape
confetti


card bases


that balloons all cut, white cardstock (background) and transparent sheet


put adhesive tape on the balloon card


Also, put adhesive tape on the white cardstock (background for the balloons). When done you can spread the confetti.


Adhere the transparent sheet to the ballons and the ballon sheet to the white cardstock (with the confetti on it).


Using the AWW Happy Birthday 3 die cut happy birthday and attach it to the card.


Thanks so much for stopping by today. Have a happy and crafty week!
Kora


Tuesday, August 31, 2021

Dragonfly Summer Decor Lantern- ATC-Happy Birthday

 Hi Y'all!
Robyn here, that time of year again where I do my best to feel younger rather than older!
Everyday we are born, everyday we are free!
Feeling stuck creatively?
Do what you love!

I love Artist Trading Cards-ATC'S!
Starting with the 
On the Mat

Extracting the dragonflies, create a rounded corner rectangle to create the ATC
2 1/2 x 3 1/2.
Backing is another rectangle cut from holographic paper

Happy Birthday banner is from
On the Mat
Print and cut.
Poped up with a few layers of scrap card stock.

Supplies:
When you get to my age, I think you should have at least a week to celebrate yourself.
Share your creative self care with us 
on Facebook in the


Comments and Questions always welcome!

Wednesday, June 17, 2020

HAPPY BIRTHDAY GIFT CARD BOX


Hello all! 
Kora here with a Happy Birthday Gift Card Box made for a young lady turning seven years.

You can find the digital cutting file here:

Choose the colors of your choice and let the cutting machine do the rest.
all cut

Suzanne made a video tutorial on how to assemble the box. You can find it here.


I added lots and lots of rhinestones because the birthday girl loves glitter and shimmering stuff. The more the better.

I also quilled the first initial of the girl's name to accompany the card.

Have a happy. crafting week!
Kora


Wednesday, May 29, 2019

Ornate Frame - Nouveau Roses - Happy Birthday - A Bit Of Fragrance Easel card


Yogi here today. Suzanne came out with a bunch of beautiful digital frames and had to use one of them. Also love the deco type roses and I was in a colorful mood...

I'm using a design element background stamp from Quietfire Design ("Crackle Background")

I'm using a clear quote stamp sets from Quietfire Design ("A Bit Of Fragrance Collection" 8pce set)  also available from Elizabeth Craft Designs HERE

And am using a few of Suzanne's electronic files available on Silhouette onLine store. Click the image to purchase.


https://www.silhouettedesignstore.com/designs/252223?search=suzanne+cannon+happy+birthday+gear+box&sortby=relevance&submitted_search=truehttps://www.silhouettedesignstore.com/designs/294316?search=suzanne+cannon+ornate+frame&sortby=relevance&submitted_search=true https://www.silhouettedesignstore.com/designs/288594?search=nouveau+rose+lantern&sortby=relevance&submitted_search=true


Opened SCAL (Sure Cuts A Lot) and the Ornate Frame. Pulled out the largest frame and deleted the rest. Flipped, squeezed and elongated it and resized it to approx 7"w x 5"h. Copy & paste, then flip top to bottom. Move to join with the first frame, overlapping slightly, weld together. Cut from white cardstock. Then score through the joined point and the upper one at the half way point through those nodes on either side. You now have your easel structure.
  
Copy and paste one of the frames from page 1 to page 2, keeping it the same size.

Paste 2 more of them and while in the same configuration as the original frame - resize them to 5.695" x 4.002 & 4.628" x 3.248" then move and orientate them on your mat to be cut from white cardstock  

The largest layer was stamped with the crackle background using Versafine Toffee and embossing with Queen's Gold embossing powder. Note: I only stamped around the edges pf the frame. No need to stamp the whole thing... Adhered to the bottom portion of the top folded part.

The next layer was colored with Distress Oxide pads direct to paper ("Twisted Citron" and a bit of "Cracked Pistachio") then dry embossed with Cuttlebug "Swiss Dots" embossing folder. High points hit with "Peacock Feathers"

Top layer: Quote stamped with Versafine Clair "Twilight" and embossed with Emerald Creek Seth Apter "Eclipse" embossing powder, then sponged with Distress Oxides all over with "Broke China" and "Mermaid Lagoon". Dampened a paper towel and wiped of inks from the quote area.


On page 3, opened the Nouveau Rose file. Ungrouped everything and moved the 4 rose pieces to the mat. Cut from white cardstock. Inked the outlines with the twilight and embossed with the Eclipse.

Added a circle the same size as rose (2.122" sq). copied and pasted 3 more and cut from the decorated cardstock below. Adhered the outlines to the decorated circles and adhered 2 of them the card front.


Opened the Happy Birthday Gear Box, ungrouped (do it several times) then delete all the misc pieces, then delete the gears above and below the Happy Birthday. Move to mat and enlarge to 5.701" x 1.356". Flip from left to right (you need a backward image for next step). Cut from white cardstock. While still on mat, apply a very thin bead of glue to each letter - careful, don't get glue on other areas... then press the decorated cardstock used for flowers onto the letters. Allow to dry a couple minutes then remove from mat and trim down to fit card floor.
 

DECORATED BACKGROUND PAPER: Wet some cold press watercolor paper and drop in Ken Oliver Liquid Metals (Verdis Gris, Amethyst, Sky, and Yellow Gold). playing and tilting and adding more water where needed. let dry.
 

On the floor: Direct to paper with the Twisted Citron and the Broken China. Used a sponge to blend colors a bit.

Scored and adhered the rose to act as my stopper.

Adhered the Happy Birthday panel, then adhered the last rose splicing to fit and used the left over and attached to stopper.


Wednesday, April 17, 2019

Happy Birthday Watercolour Tulip Tag Box and Watercolour Box- Silhouette Print and Cut technique

Hi Y'all!
Robyn here, digitally gearing up for a busy spring 
birthday season!
April and May keep your postal service in business around here so I need to have a heavy stash.
No paint brush or stamps touched these projects!
Print and cut is easier than you think.
On the Mat
  • Ungroup 
  • Move the print and cut elements to the working mat area
  • Choose show registration marks and make sure all elements are within the hatch marks


  • Send the design to your printer.
  • Place the paper on your mat and cut and it will automatically read the registration marks and cut.


The box is just one piece!

On the Mat


With registration marks


Printed and cut

You can do it!
We can help!
Join the Suzanne Cannon Fan Group 
On Facebook
to share your creations and comments
and questions!
Create without limits!
and Happy Birthday to all!