Wednesday, September 13, 2017

Kitty Love Hug Bendi Card

Hello, Connie Nichol here today with an adorable kitty bendi card using a cut file designed by Suzanne Cannon.  It's available in the Silhouette Design Store here for the Silhouette or as an svg file for other electronic cutting machines.  I've never made a bendi card before and I was super impressed with how quick and easy it was to create.  I was having so much fun, I made three bendi cards with slightly different variations.  You don't have to just use cardstock when you're creating these - patterned paper is very fun too, or a combination of both.  I added googly eyes from the dollar store to a couple of the kitties.


The cut file is just one big kitty and some hearts, so it is very easy to cut and put together.


I added a stamped sentiment from the Happy Birthday Plain and Simple stamp set from Quietfire Design.


That's it!   Give the Kitty Love Hug Bendi Card a try and make your own family of kitties.  Happy crafting, Connie


Wednesday, September 6, 2017

Lantern Christmas Noel & Halloween Boo - Have Yourself a Merry Little Christmas

Yogi here today with a couple lanterns. Suzanne recently came out with a Christmas lantern available on the Silhouette onLine store.. Love the shape. And while making it, I said to myself it would make a great Halloween lantern...

Click on the file image to purchase (also available in SVG format)

https://www.silhouettedesignstore.com/view-shape/209600

I'm using an A Way With Words die "Noel" from Elizabeth Craft Designs, also available on Quietfire Design HERE (please note, there are a lot of Noel cut files by Suzanne in different calligraphic hands available in the Silhouette store... I just happened to have the die cut on my desk and grabbed it...).

I'm also using a sentiment stamp from Quietfire Design ("Have Yourself A Merry Little Christmas" 3pce set) 

Click on any lantern image to enlarge.

quietfiredigital.blogspot.ca
I opened my SCAL (Sure Cuts A Lot) software and opened the lantern file. It takes about 1 sheet of 12 x 12 and 1 sheet of 8.5 x 11 cardstock. (See below for the layout in SCAL)

I cut everything from white cardstock. Folded along all the score lines. Then inked the lantern sides with Versafine "Vintage Sepia" and embossed with Emerald Creek "Verdigris". Glued the edge, top and bottom piece to close the lantern.

Painted the top piece with Distress dabber "Black Soot" inked with Versamark and embossed with Distress "Black Soot" embossing powder. I wanted a rough texture. Attached a green/gold narrow ribbon through the peak and adhered to the base of the roof prior to adhering to the lantern. Added some hot glue at the peak to ensure the ribbon stays put and to close up the hole I made...

Die cut the "Noel" from an off white cardstock and adhered to front.

Inked the holly leaves with the sepia and embossed with Queen's Gold embossing powder. Adhered to roof and front.

Added Liquid Pearls "Rouge" generously to create berries. When dry, added "White Opal" dots.

 
Stamped the sentiment on white cardstock using Versafine Black Onyx and clear embossed. Drew a wavy line mimicking the sentiment and cut along the line, then cut to separate the words and adhered parts on the three sides.

Here's what the Halloween lantern looks like. I used pumpkin and black cardstock only. Easy Peasy... no painting and I only added glitter to the "Boo" word and the owl's eyes.

I used the same file as the Christmas Lantern and then scavenged in my Halloween files for the various little elements. These are the files I scavenged... Click on any of those images to purchase.
https://www.silhouettedesignstore.com/view-shape/152659   https://www.silhouettedesignstore.com/view-shape/48609

https://www.silhouettedesignstore.com/view-shape/158548  https://www.silhouettedesignstore.com/view-shape/67389

 Click on any lantern image to enlarge.

The first 2 SCAL images are for the lantern layout. The 3rd image is for the Halloween scavenged images. I set them on the top and bottom of my mat and hanging off the edges so I wouldn't waste paper or time for cutting...


 Hope you'll give one of them a try. They go together really easily.


Wednesday, August 30, 2017

Happy birthday Tag Box- Print and Cut

Hi Y'all!
Robyn here raising the bar this year gifting myself!
This versatile  file could be used as a hostess gift, party favors, place settings, or a surprise gift for yourself!
( By my birthday I'll forget what's in it!)
Print and cut on the Silhouette is easier than you think.

On the mat

Print and Cut
( I am still using V2, so the step out is not V specific- the general steps will apply to any version)
  • Ungroup the file and keep just the happy birthday element on the mat
  • Turn on registration marks 
  • Place the element on the page making sure it is inside of the registration marks.
  • Send to the printer.
  • Load your printed element page to the Silhouette.
  • Send to Silhouette and follow the instructions from there.


Assembly is easy. Suzanne has done all the work for you.
The box fits perfectly inside of the tag.
***TIP***
If you have a hard time seeing the fold line perforations, hold the paper up to the light.

I'm going to stash a little special something inside, and place it in my birthday box to open on the day.
What will be in yours?

To visit artist desks world wide, (and other birthday happenings) please visit my blog.

Comments and Questions Welcomed!

Wednesday, August 16, 2017

3-D Cube Birdcage with Flowers

Hi y'all Robyn here today, putting a bird in a gilded cage!
This lovely design can be assembled and enjoyed by novice and experienced alike!
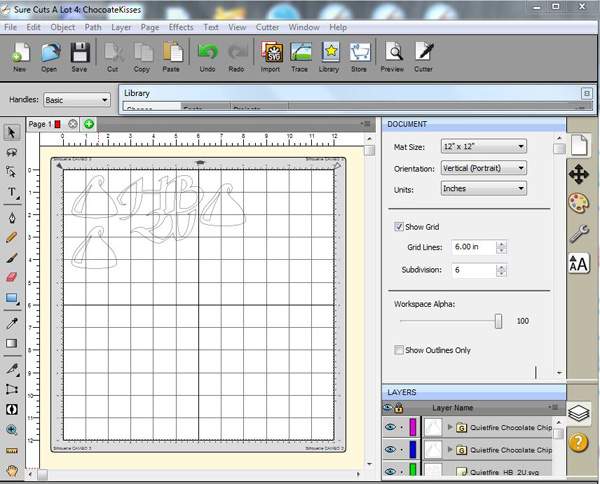
On the mat

First time with 3-D?
Follow these tips to success:
  • Take your time. Enjoy the creative journey as much as the finished product.
  • Make a dummy. Cut the project first out of paper you don't care about- scraps are fine for this. Make your mistakes cutting and assembling before you cut your final paper.
  • Take your time! The more precision in your folds and glueing, the better the outcome.
  • Use high quality strong adhesives.
Suzanne has done all of the difficult design and score work for you- so all ou has etc do is cut and paste and create!
I you have any difficulties, just leave a comment.

These would make adorable shower decorations, place card holders for a small dinner party, or add a battery votive and string them to light up a dance floor!

Please share your creations with us- a little birdie wants to know!


To see what else is on my desk, please hope over to RainbowWeaves.
Comments and questions welcomed.

Wednesday, August 9, 2017

Flourished Logo Happy Birthday Paint Chip Cards

Hi, Connie Nichol here today with a quick and easy idea for birthday cards.  I was messing around with some leftover paint chip samples (much too pretty to toss out!) and playing with ideas for using them in scrapbook layouts (check out the upcoming fall issue of Creative Scrapbooker Magazine). With only minor embellishing, the paint chips also make a perfect background for a colourful card.

connie nichol, quietfire design, flourished logo paint chip


 I cut the flourished 50, 60 and 70 out of black cardstock using my Silhouette Cameo and the cut files designed by Suzanne Cannon in the Silhouette design store (other milestone numbers are also available!).  As always, if you want these files as an svg file for another electronic cutting machine, just email suzanne@quietfiredesign.com.  Here's the flourished 70 cut file.  Isn't it pretty?  Just adhere that to a colourful paint chip.  These particular ones are from Home Depot.  I love paint colour names and the interest that they add to the background.


Adhere a bit of ribbon, stamp a sentiment and attach to a card base.  Done like dinner.  So quick.  The happy birthday stamps I used are from a Quietfire Design set called Happy Birthday plain and simple.  This is so versatile with lots of sizes and font styles to choose from.  Make sure you stamp with a solvent ink like StazOn by Tsukineko or Surfacez by Clearsnap.  The paint chips are a bit glossy and regular dye ink will just smudge and wipe off.


Hope you enjoyed this paint chip recycling idea.  Have a great day, Connie


Wednesday, August 2, 2017

Chocolate Kisses - HB2U - YUM


Yogi here today with a yummy card... you can never have too much chocolate!!!

I'm using a couple of digital files from Suzanne available on the Silhouette onLine store - click on an image to purchase.


I'm also using a sentiment and a coupe Fill 'er Up letter stamps from Quietfire Design ("Graphic Love Bits - Flowers or Chocolate..." 6pce set); ("JOY Fill 'er up"); ("MUm fill 'er Up" 2pce set);

Check out all the fabulous ribbons on Quietfire Design. I'm using "Ribbon Satin dotted Burgundy


Opened the 2 files in SCAL, increassed the sizes for my card size of 7"w x 5"h. Copied and pasted the kisses to get 3 of them, cut from white cardstock. Colored the chocolate and the HB2U with Distress acrylic dabbers. Dried. For the kisses, only the dark brown section, I inked with Versamark and clear embossed. For the HB2U, I ran thru my embossing machine with Cuttlebug "Swiss Dots" embossing folder, then hit the high points with a dark brown pad, then with Versamark and clear embossed.

Scored and folded my pink toned cardstock to create the easel (7"w x 5"h), then cut another piece the same size and adhered to front. Used my Misti to stamp the letters "YUM" inking with Versafine Sepia and then hitting here and there with Black Soot. Clear embossed. I had a brand new pack of Ecoline watercolor markers on my desk, so colored the letters with them. Adhered the kisses to the front.

On the floor: Cut a 3/4" wide piece of the pink cardstock the width of the card. Scored down the center and adhered to floor to act as my stopper. Also adhered part of the HB2U to this piece and the bottom section to the floor.

Stamped the sentiment with the black and clear embossed. Colored the flower with the Ecoline markers.

Added the dotted burgundy ribbon as a frame border and tied a small bow.

Thought that left bottom area was a bit sparse, so added the ladybug (Elizabeth Craft Designs) that was sitting on my desk.


Click on any card image to enlarge. Enjoy

Friday, July 28, 2017

Star Snowflake Box and Card - Xmas in July


Hi all, Yogi here, I was enthused by this star box from Suzanne and thought I'd make one... and post it here even though it's not really my time to post something BIG GRIN... Don't forget it's Xmas in July sale at Quietfire Design and Xmas stamps are 25% off

I'm using a  digital file from Suzanne available on the Silhouette onLine store - click on an image to purchase.

https://www.silhouettedesignstore.com/view-shape/208391 
I'm also using a bunch of sentiment stamps from Quietfire Design
("International Merry Christmas" 6pce set)

Opened the file in SCAL, copied the snowflake to a new page to cut later. Decreased the snowflake on the 1st page to 2.5"w. Cut from a textured 12 x 12 mid toned blue cardstock. Then went back to the normal sized snowflake and cut from a light toned blue cardstock.

Assembled the bottom and top of box. 


BE CAREFUL - adhere the narrow side piece to the larger star shape...

Inked the smaller snowflake with Vesamark and embossed with Emerald Creek "Fractured Ice" (this is such a fun embossing
powder...). Punched a whole in the center of both snowflakes and in the lid of the box, added the snowflake brad and then attached to lid also adding a bit of glue to the snowflake to make sure it stayed in place.

Created the background by placing all the stamps on my acrylic block, inking with Versafine "Majestic Blue' and clear embossing. Repeated and moved my stamp block in a different direction. Continued till my whole piece of cardstock was covered. Cut both sizes of stars and adhere to the inside of the lid and box.

Created a matching card by placing the large star on my mat, copying it and flipping it, making sure it overlapped the first star slightly. Selected both stars and welded together.

Also pasted both sizes of snowflakes to my mat.

Cut everything from white cardstock.

I had a scrap piece of the light blue cardstock left over so cut a star the card front size. Adhered to card.

Cut a star slightly smaller than front from the text background cardstock. Adhered to front.

Painted the larger snowflake with Distress dabber "Broken China" and the smaller snowflake with "Mermaid Lagoon". Inked the smaller one with Versamark and embossed with the fractured ice. Punched a hole in both snowflakes, added the snowflake brad and adhered to card front.


Click on any card image to enlarge. Enjoy