Wednesday, March 7, 2018

Flourished Shamrock - Atomic Lucky - ECD Friend - May Your Longest List - Side Easel


Yogi here today and it's almost time for St Patrick's Day...

I'm using a stamp that was meant for Christmas... but with a little masking it's now good for any time of the year. How many stamps or dies do you have in your stash that you only use for what they were originally meant for?? Why not look at them again and see what you can do with them - you'd be surprised...

I'm using an A Way With Words dies  "Friends"  from Elizabeth Craft Designs, also available on Quietfire Design HERE

I'm also using a quote and sentiment stamps from Quietfire Design  ("May Your Longest List at Christmas..."); ("You Are..." 5pce set)

Also using a couple electronic cut files from Suzanne available on Silhouette. Click image to purchase. 


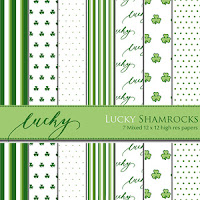
  and the digi paper available from Suzanne on Quietfire Design 

http://www.quietfiredesign.ca/Lucky_Shamrock-Scrapbook-Paper-Digital-Papers.html


Opened the two Silhouette files. Decreased the size of Lucky to 6.5"w. Cut from white cardstock and colored while on my mat with various distress green pads. Removed from mat and embossed both shamrocks using Emerald Creek "Green Sparkle" embossing powder. Clear embossed the tiles for Lucky. Mounted the tiles onto a dark green cardstock and trimmed down.

See template image at right to create the card structure. I used a 12"w light green Bazzill Monochromatic cardstock cut to 5"h. Scored and folded at 7". Then scored diagonally across the 5" section
.


Fold the "A" over and use it as the template to cut a front piece the width of the card and diagonally to the diagonal score line. Image above card template image on template. Adhere to front of card.

Using my Tim's Stamping Platform, stamped the "You Are So" using Versafine Black Onyx and clear embossed.

Adhered the "lucky" strip on the bottom and them the flourished Shamrock of the edge of the fold.

 
On the floor: Printed out the digi paper of the smaller shamrock pattern, trimming down and adhering to floor.

Again used my Stamping Platform, masking of the "Christmas" words and stamping using the black. Stamped the bottom part of the quote onto tracing paper and repositioned my card and stamping. Clear embossed the quote.

Scored the shamrock and adhered to floor to act as my stopper.

Die cut the Friends, fussy cutting the "s" off... inking with a green pad and embossing with the green sparkle embossing powder.

Raided my stash for the letters for "My" (Elizabeth Craft Designs "Upper Case Alphabet")


Wednesday, February 28, 2018

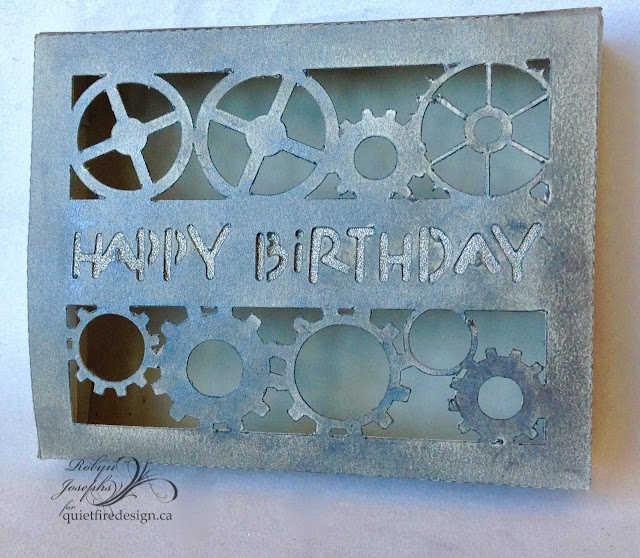
Happy Birthday Balloons Box Card/ Happy Birthday Gears Box Card, and more!

Hi Y'all!
Robyn here with
  Suzanne's latest Silhouette files to the rescue
as I have hundreds of spring birthdays!
I'm highlighting two of the new birthday card boxes- they fold flat for shipping- they are all one piece (and embellishments)
and
 are all on sale right now 50% off!

on the Mat
Scraps make great balloon bunches! and put some into your card for an opening surprise.

The little long tab on the top is the only place you need to put adhesive.

On the mat
15 minutes or less for this one!
Grunge it up or not!
***12yo male gender identity testimony***
"Cool Miss Robyn!"

Others in this collection:
Happy Birthday Flourished Box Card


Thanks for visiting and I encourage you to get cutting!
Do ask if you have questions and comments are welcomed.

Wednesday, February 21, 2018

Pansy Cards

Hello, Connie Nichol here with two cards featuring the pansy cut file available here in the Silhouette Design store.  I love pansies.  They are so cheerful and one of the first flowers I see for sale in local greenhouses in the springtime.  Because they tolerate some frost, I can plant some pansies in the front of my house long before I would dream of planting any other flowers.

I created the card just as it came on the cut file, but you could certainly think about just cutting out the pansies and using them to adorn just about anything.    (Hmmm, I just inspired myself to create a scrapbook layout with a bunch of pansies.  Stay tuned.....)


I started with purple cardstock and a yellow pansy, and then flipped the colours around to see how that worked.  I think I prefer the purple, but the yellow is nice too.  And that's the beauty of electronic cut files - trying different colours and sizes.  Next time I will try a white pansy with a purple face, a yellow pansy with a black face and a blue pansy with a white face and they will all be beautiful.  Just add a Quietfire Design stamp and you are good to go.


I feel fortunate I was able to make these cards at all since I had a 'helper'.  My cat Charlie was quite interested in the movement of the electronic cutter and also wanted to help glue.  Sigh.  

I'm hoping spring comes soon so I can go buy some real pansies.  Their little faces just make me happy.  Happy paper crafting!


Wednesday, February 14, 2018

Flourish Heart-Pop Up, Leafy Heart, Cherish

Hi y'all!
Robyn here with a card suitable as a last minute valentine or any occasion 
you want to tell someone you care.
Glitter has been kept to a minimum incase it goes out to someone who is sparkle impaired!
From the inside out...
On the mat


This is the fun and freedom of digital cutting!
  • ungroup
  • make compound path
  • release compound path
  • regroup
  • duplicate
  • rotate
  • making sure all essential parts are slightly overlapping, Weld
  • delete non-essential points in point editing
  • Cut and fold
  • Admire!


Back to the front!

On the mat

  • Stencil, Elizabeth Craft Designs Hearts and Paws, using worn lipstick distress ink.(sold out!)
  • Die Cut Elizabeth Craft Designs , A Way With Words, Cherish

Create a rectangle on the mat to size your heart frame.

Cut and paste it all together and share the love around!
The next few weeks we are going deep into the archives to use our oldest stamps and dies from 
Quietfire Design.

Outtake from this project and  WOYWW here.

Y'all come back now! Hear!

Comments and questions welcomed.


Wednesday, February 7, 2018

Heart Fireworks - Love Script - Love Is Friendship - Side Easel

Yogi here today and making a last Valentine's Day card... A real easy peasy one...

I'm using an A Way With Words dies  "Baby/Love Script" 2pce set from Elizabeth Craft Designs, also available on Quietfire Design HERE but go ahead and use the love word that comes with the cutting file.

I'm also using a quote stamp from Quietfire Design ("Love Is Friendship...")
 

Also using an electronic cut file from Suzanne available on Silhouette. Click image to purchase. 
https://www.silhouettedesignstore.com/view-shape/246394
Opened the Silhouette file and moved the text off the mat. Increased the size of the fireworks to approx 6.5"w. (click on image to enlarge)
 
From my image library - opened a half circle image and surrounded the fireworks - sizing it to approx 7"w x 4.5"h.

Selected one of the hearts and increased it's size to approx 2.75"w x 3"h

Cut all from white cardstock. While on the mat, sponged Distress Oxides on the Fireworks piece all over, then swiped my "Fired Brick" pad over the surface to give some variation to the background.

Removed the negative pieces from the fireworks and applied double sided tape to the backside of all the fireworks. Sprinkled with a Warm Highlights glitter. Burnished.


Removed the hearts and applied double sided tape to the backside of the hearts, flipped over and sprinkled with a red glitter, being careful to stay away from the previous applied glitter. Burnished. Adhered to another half circle piece.

Die cut the script word "Love" from a red metallic cardstock (recycled Bernard Callebaut Chocolate box... empty of course BIG GRIN)


Created the easel structure - top image on above cutting mat. I added a small square to the half circle (approx 1"sq) and welded it together. Scored the little square diagonally from the lower right corner to the upper left corner. Adhered the backside of the Fireworks piece to the lower right hand front section of the little square. You now have your side easel...
 
 On the floor: Stamped the quote using Versafine Black Onyx and clear embossed.

Applied double sided tape to the large heart, trimmed of excess tape and sprinkled with the red glitter, burnishing well. Scored about 3/4" up from the point on the heart and adhered to the floor to act as my stopper.

Adhered the drop out hearts randomly to the floor. Sponged some of the Worn Lipstick around the edges.


Wednesday, January 24, 2018

SURPRISE DRAWERS GIFT TREAT BOX / Funky Love You Gift Box /

Hi Y'all!
Robyn here, still in 3-D mode!
This box has some assembly required and I found it a lot of fun to put the pieces together and embellish.
On the mat

On the mat
I separated out the heart and love for design elements on the drawers.
Love you is from Suzanne's new font collection

Patterned paper was created with new Elizabeth Craft Designs stamps, designed by
Suzanne Cannon
Love and Hearts Collection


Share the Love! Quietfire Digital style!
Comments and Questions Welcomed!


Wednesday, January 17, 2018

Valentine - Love Heart - Z Fold Card - The Door Was Marked

Yogi here today and thought I'd get ready with Valentine's cards...
 

I'm using an A Way With Words dies  "Just For You" 2pce set, "Flourished Frame" 2pce set, and "Calligraphic Elements 3" 9pce set from Elizabeth Craft Designs, also available on Quietfire Design HERE, HERE and HERE

I'm also using a quote and sentiment stamp from Quietfire Design ("The Door Was Marked..."); ("Valentine-Love" 8pce set)

 Also using a couple electronic cut files from Suzanne available on Silhouette. Click image to purchase. 


Opened the Be My Valentine file, and moved everything off my mat except the hearts border. Increased the size to 1.356"h x 7.444"w. Copied and pasted a 2nd line of the hearts. Also opened the "Love Heart" file and increased the word to 4"w. cut all from white cardstock. Inked with Distress Oxide "Worn Lipstick" and embossed with Emerald Creek "Chinese New Year" embossing powder.

Manually cut the card base from pink cardstock, cutting diagonally across an 8.5" x 11" piece of cardstock, starting at the 7"h point down to the 4" point.

Scored it at approx 3.6" increments. (divide the 11" width in 3)

Adhere the heart borders to the top edge of card base, separating the hearts at the score line point if it interferes with folding.

I used a paper mask to protect my card base when inking the backside of the center hearts (since they are visible when card is closed...), using the same pad and embossing powder.

Electronically cut the "Love Heart" from white cardstock and inked and embossed as heart border. Kept the little drop out heart, clear embossing that piece. Adhered to card front.


Used my Tim's "Stampin Platform" to stamp the valentine sentiment using the "Worn Lipstick". I had to stamp it twice to ink on either side of the flourish... Clear embossed.

The double hearts are the drop out pieces from the border inked with the worn lipstick. Some of them have little nicks on their edge, so adhered a good one over the nick then clear embossed them. Adhered them here and there.

Die cut the "Just For You" and the "flourish" from white cardstock, inked with the worn lipstick and clear embossed. Adhered to center section adding a double heart.

Stamped the quote on white cardstock using the worn lipstick, clear embossed and die cut with Elizabeth Craft Designs "Stitched Ovals" set, sponged edge with the lipstick and adhered to 3rd panel. Adhered the double hearts and the heart/bow.