Showing posts with label Yogi Grunwald. Show all posts

Wednesday, March 20, 2019

Dinosaur Monogram - Wishing You Whimsy - Accordion card

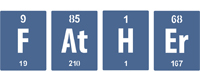
Yogi here today and I wanted to do something with the Periodic Table letters... but then got side tracked with the dinosaur font...  BIG GRIN

Card size is 4.25"h x 5.25"w (card closed) Opens to 31.5"

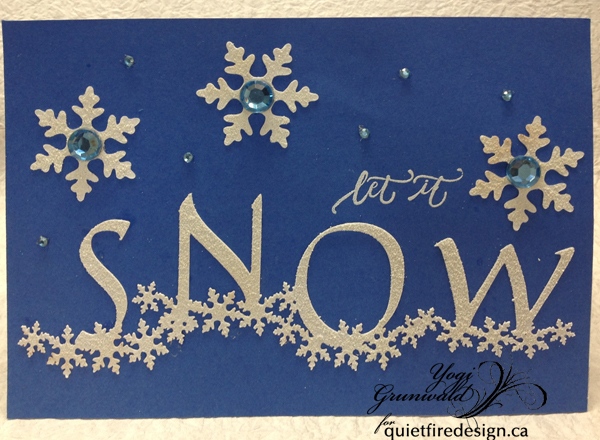
I'm using sentiment stamps from Quietfire Design ("Wishing You Whimsy..." 4pce set)

And am using an electronic Monogram file (OTF) from Suzanne Cannon available on Silhouette onLine store. Click image to purchase.  
https://www.silhouettedesignstore.com/designs/274090?limit=120&sortby=relevance&search=suzanne+cannon+dinasaur+&submitted_search=true&
Opened SCAL (Sure Cuts A Lot) software and typed the "Badlands" word, one letter at a time. Selected all and enlarged. Cut from white cardstock and while still on the mat colored with colored pencils. Removed from mat and set aside.

Created a large shadow layer for each letter and cut from black cardstock. Adhered both layers together.

 Created the accordion fold structure. Cut an 8.5 x 11" mint green and baby blue cardstock in half length wise to make 2 pieces of 4.25" x 11" of each color. Cut the lengths in half to make a bunch of 4.25"h x 5.5"w pieces. Scored and creased each piece at 1/4". Adhered to the back of the next color. Starting with a green, then a blue, then a green etcetera. 6pcs total for this card.

When all assembled ran through my embossing machine using Cuttlebug Happy Birthday embossing folder, moving the folder over each time - till the whole card was embossed.

Pic below is the back side:

Adhered my colored letters onto each page section, placing 2 smaller letters on one page and the larger letter as a single on the next page.  
 
Stamped the words onto white cardstock using Versafine Clair "Glamorous" ink pad, and masking between the words on the stamp. Cut around each word section and hit the edge direct to paper with Distress "Faded Jeans". Adhered to each page.
 
Final touch, added a bead of Viva Iridescent Glitter down the center of each letter. Sorry hard to see that detail...

 This would make such a cute card for a little boy  (or girl...) who like dinosaurs or things prehistoric. BIG GRIN.


Wednesday, February 27, 2019

Barista - But First Coffee - Just For You Celebrate

Yogi here today - and Suzanne came out with more coffee digital images... and you know how much I love coffee. BIG GRIN

I'm using a design element stamps, quote and sentiment stamps from Quietfire Design
("Grid Background"); ("But First Coffee" 8pce set); ("Tea" 7pce set); ("Just For You" 4pce set)

And am using an electronic file from Suzanne Cannon available on Silhouette onLine store. Click image to purchase.
https://www.silhouettedesignstore.com/designs/287861?search=suzanne+cannon+barista&sortby=relevance&submitted_search=true
Opened SCAL (Sure Cuts A Lot software) and the - Barista file. Removed the box piece. Grouped all and increased size so one of the page layers was approx 6.7"w. See layout below. Cut all from white 110# Staples Cover cardstock.

Copied and pasted the "barista" layer to page 2 and flipped it so it hangs off the cutting area. I only wanted the "barista" word. Cut from an alcohol decorated background (see below). Fussy cut the "barista" word apart from the frame and adhered to the background layer.
 
Inked the grid stamp with Versafine "Toffee", repeatedly stamped on both layers and then embossed with Queen's Gold embossing powder. Sponged Distress "Picked Raspberry" and "Mustard Seed" all over.

Inked the cup direct to paper with the Barn Door and embossed several times with UTEE to get a really glossy ceramic look. Adhered to front layer. Inked the shine with white and embossed with Stamp Mania "Glacier White" embossing powder. Adhered to cup. Inked the steam piece with Versamark and embossed with Emerald Creek "Soft Fallen Snow" - love the textural effect.

Cut, scored my easel structure from cream cardstock.

Dry embossed a piece of brownish cardstock using Cuttlebug "Happy Birthday" embossing folder. Hit the high points using Distress Picket Fence pad. Trimmed down to the straight edges of the front layers. Adhered to easel structure.

Adhered the Barista layer using 3D foam tape, then the cup layer with 3D foam tape.

On the floor. Stamped the cup rings with Distress "Vintage Photo" for some of the rings and "Black Soot" for others, overlapping. Sponged some brown around the edges and lightly over the stamping. Misted with water. Dried

Stamped the "Just For You" and "Celebrate" with the black and clear embossed.

Stamped the "Coffee & Friends" with the black on white cardstock. Clear embossed. Die cut the stamped layer and the brown layer with Spellbinder's Petite oval die sets. Adhered both together then onto the floor with 3D foam tape to act as my stopper.

Added a small piece of folded cardstock along the left edge to help with my stopper. 

Applied The inks "Pitch Black", "Teakwood", "Sepia", "Rose Gold" and some Alcohol Blending solution to my felt tool then pressed and twisted the tool onto my photo paper. After doing this to the whole paper, leaving some white areas, started bouncing the tool lightly in some areas.

I love the result I got from the twisting motion. 


Wednesday, January 9, 2019

Quotemarks Heart Bookmark - Coneflower - Love You


Yogi here today with a Valentine style bookmark for my baby sister who loves reading...

I'm using a design element background stamp from Quietfire Design ("Crackle Background")

And am using a few of Suzanne's electronic files available on Silhouette onLine store. Click images to purchase. 

 https://www.silhouettedesignstore.com/designs/52906?search=suzanne+cannon+bookmarks&sortby=relevance&submitted_search=true 
 https://www.silhouettedesignstore.com/designs/65408?search=suzanne+cannon+coneflower&sortby=relevance&submitted_search=true

https://www.silhouettedesignstore.com/designs/53580?search=suzanne+cannon+Love+You&sortby=relevance&submitted_search=true
Opened SCAL (Sure Cuts A Lot software) and the - Quotmarks, Coneflower & Love You files. See layout below. Cut all from white 110# Staples Cover cardstock.


Inked the crackle stamp with Versamark, repeatedly stamped and then clear embossed. Sponged Distress "Barn Door" and "Mustard Seed" all over. Gently wiped excess inks off crackle area with a damp paper towel.


Extended the heart shape on the 2 small partial bookmarks and cut out. Inked with the Barn Door and embossed with Emerald Creek "Chinese New Year". Adhered to tag - front and back.

Colored the coneflower pieces with the Mustard Seed and then a touch of "Fossilized Amber". Forthe flower head with "Forest Moss and then with some "Brushed Cordury", the stem with the Forest Moss. Adhered all together and then onto bookmark. Added some textural squiggle marks using Liquid Pearls "Avocado".


Inked the "Love You" with the Barn Door and embossed with the Chinese New Year.

Inked the drop out hearts using Versamark and embossed with Emerald Creak Baked Texture "Vintage Beeswax". Adhered to bookmark so the flourishes on Love you fell on the hearts to protect them. Then adhered the Love You.

Wednesday, December 26, 2018

Butterfly Flourished Heart - Valentine - In A Perfect World - Easel card


Yogi here today and Christmas is over at last... and I thought I'd work on the next significant card making event - Valentine's.

I'm using a quote and sentiment stamp from Quietfire Design ("Calligraphic Love Bits" 5pce set); ("In A Perfect World..." 4pce set)

And am using a couple of Suzanne's electronic files available on Silhouette onLine store. Click images to purchase. 


https://www.silhouettedesignstore.com/designs/50365?search=suzanne+cannon+hugs&sortby=relevance&submitted_search=truehttps://www.silhouettedesignstore.com/designs/179785?search=suzanne+cannon+butterfly+flourished+heart&sortby=relevance&submitted_search=true
Scored, and folded my red textured cardstock to create my easel card structure (card size: 7"w x 5"h). Cut another piece from the red same size as card, adhered to front.


Opened SCAL (Sure Cuts A Lot software) and the Heart Butterfly Flourish file. Removed the card base image. Increased size of Heart/Butterfly to 6.7" x 4.5". Selected all and copied/pasted a 2nd image on my mat.


Opened the "Hugs" and increased size to 5"w x 1.9"H. Copied and pasted and selected "Shadow" style.

Cut everything from white cardstock. removed one of the Heart/Butterflies from the mat, cut away the butterfly flourish (keep for later) and inked the heart with Archival "Vermillion" ink pad, clear embossed. Set aside.

Colored the butterflies using Faber Castell Pitt pens and cut away from the vine.

On the other Heart/Butterfly colored the butterflies with the same colors as above. Adhered the cut away butterfly - bodies only. Using an embossing pen, inked the wings only and embossed with Emerald Creek Iridescent Shimmer embossing powder.


Adhered a piece of white "Coral Reef" paper to the card front and then the Heart Butterfly Flourish. 


On the floor:

Inked the "Hugs" using Versafine "Toffee" and embossed with Queen's Gold embossing powder. Inked the shadow layer with the Vermillion and clear embossed. Adhered both layers together and inked with Versamark and clear embossed (this gives a shiny layer to the gold layer and helps adhere the two layers together. Score and adhere to floor to act as a stopper.

Stamped the "Valentine" and the quote on white cardstock using Versafine Black Onyx and clear emboss. Sponge some Distress "Fired Brick" around edges and adhere to floor.

Add some flourish pearls


Wednesday, November 28, 2018

Music Dingbat - Christmas Wreath - Merry Christmas - Music Exresses - Easel

Yogi here today and I wanted to do something musical with Suzanne's latest Music Dingbat font...

Also using a quote and design element background stamps from Suzanne available on Quietfire Design  ("Music Expresses"); ("Merry Christmas Background"); ("Grid Background")

I'm also using several digital cut files from Suzanne available on Silhouette onLine store. Click images to purchase. 


https://www.silhouettedesignstore.com/designs/279850?search=music+dingbat&sortby=relevance&submitted_search=truehttps://www.silhouettedesignstore.com/designs/51599?search=holly+twig+berry+wreath&sortby=relevance&submitted_search=truehttps://www.silhouettedesignstore.com/designs/52025?search=Suzanne+Cannon+Merry+Christmas&sortby=relevance&submitted_search=true

Scored and folded my dark grey toned cardstock to create the easel structure. Cut another piece from a matte silver cardstock same size as card and adhered to front.

 
Opened my SCAL software (Sure Cuts A Lot) and created the musical background using the Music Dingbat font. Made sure everything touched something and then cut from white cardstock. Inked with Distress Black Soot Oxide pad. Doodled with a silver gel pen on the large treble clef.

Cut the white 1/2" wide frame, same size as card front and embossed with Cuttlebug "Swiss Dots" embossing folder. Adhered the musical notes and frame to the front, some under the frame and some on top of it.

Stamped the quote using Versafine Black Onyx and clear embossed. Die cut with Elizabeth Craft Designs "Stitched Circle" die set. Adhered to edge of frame front.


On the Floor: stamped the Grid pattern on an angle twice on white cardstock using my Tim's Stampin' Platform with Black Onyx and clear embossed. Trimmed down.

Stamped the Merry Christmas background on white cardstock with Distress "Pumice Stone" and embossed with Silver Detail embossing powder, then electronically cut the Merry Christmas. Also cut a shadow layer and inked with the Oxide black. Adhered both together then onto the grid background.

Cut the holly and berry branches from white cardstock, inked with oxide pads and adhered to floor. Adhered everything to floor with 3D foam tape.

Final touch added Liquid Pearls "White Opal" and Red" to the berries.


Wednesday, October 31, 2018

Snowflake Monogram Font - To Appreciate The Beauty

quietfiredigital.blogspot.ca
Yogi here today and I had an urge to create this snowflake card. Love this OTF font from Suzanne

I'm using a couple of the newest stamp sets from Quietfire Design  ("To Appreciate The Beauty..." 3pce set); ("Let It Snow..." 6pce set)

And am using a couple of Suzanne's electronic files available on Silhouette onLine store. Click images to purchase. 


https://www.silhouettedesignstore.com/designs/270459https://www.silhouettedesignstore.com/designs/69217

quietfiredigital.blogspot.ca
Scored, and folded my white cardstock to create my easel structure (7"w x 5"h). Cut another piece same size as front. Also cut a piece from a deep blue thin cardstock.
quietfiredigital.blogspot.ca
Typed the letters - S N O W, one letter at a time using the "Snowflake Monogram.otf" font from Suzanne. Overlapped the snowflakes to make sure everything was touching something else. Selected everything and increased the size to 6.7" x 2.26". Cut from white cardstock. Inked with Distress Picket Fence and embossed with Emerald Creek "Soft Fallen Snow" - love that texture... Adhered to the blue thin cardstock.

Stamped the "let It" using the Picket Fence and embossing with Ranger "White" embossing powder. Adhered the blue cardstock to the white and then onto the card front.

Selected one of the snowflakes from the "Let It Snow Flip card" electronic file and cut from white cardstock 3 times. Inked with the Picket Fence and embossed with the Fallen Snow. Adhered to card front. Added large mid toned blue rhinestones to each center. Also adhered mini of the blue rhinestones adding a dot of Glossy Accents to hold them in place.

quietfiredigital.blogspot.ca
On the floor: On another piece of blue cardstock and using my Tim's Stampin Platform, stamped the quote using Versafine "Blue Lagoon" and clear embossed. Offset my cardstock by about 1mm, both from the bottom edge and the left side edge and re-stamped using the Picket Fence and embossing with the White embossing powder. to the floor.

Stamped the snowflake borders with the Picket Fence and embossed with the Fallen Snow.

Drew the outline of the Snow word onto white cardstock. Cut with scissors, inked with the Picket Fence - masking off the rest of the cardstock, and embossed with the Fallen Snow. Scored the length, trimmed off the excess cardstock to about 1/2" and adhered to floor to act as my stopper.


quietfiredigital.blogspot.ca

Wednesday, September 26, 2018

Science Alchemy - Periodic Table Father, Lucky - Drop In For A Bite - Trick or Treat

Yogi here today and I had an urge to create this Halloween card. I had the word "Alchemy" floating around in my brain and it wouldn't go away...

I'm using one of the newest stamp sets from Quietfire Design ("Something Wicked 2018..." 6pce set)

And am using several of Suzanne's electronic files available on Silhouette onLine store. Click images to purchase. 


 https://www.silhouettedesignstore.com/view-shape/183445https://www.silhouettedesignstore.com/view-shape/228812

Scored, and folded my white cardstock to create my side fold card (5"w x 7"h). Cut another piece from a deep purple and adhered to front.

Typed the letters - A L C E M using the "Science.otf" font from Suzanne at approx size of 90. Printed on white cardstock and cut into good sized squares.

Electronically cut the "H" and the "Y" using the Periodic table words "Father" and "Lucky" from Suzanne. Trimmed everything down to fit my card front. (A 1.5 x 2"h; L & C 1.25 x 2"h; H 1.75 x 2.75"h; E & M 1.75 x 2"h; Y 1.75 x 2.75"h)

Sponged all the letters with Distress "Carved Pumpkin" and then direct to paper around the edges.  Adhered all the letters to card front leaving a central space for my beaker.

Hand cut 3 triangles from white cardstock. The larger one 1.5"w x 4.5"H and the smaller one 1.5 x 1.5"h. The the inner triangle (representing the liquid) I cut a little narrower than the large beaker to simulate the glass wall. Sponged it with Distress "Twisted Citron" and "Dusty Concord". Ran all 3 triangles through my embossing machine with Carabelle Studio "Petites Roues" (something that will give a nice bubble effect to the glass). Assembled and adhered to front. Cut a narrow rectangle for the stir stick, rounded the edges and colored with the Concord.

Applied Quickie glue to the beakers in the font letters and sprinkled with a lime green and a purple glitter.

Stamped the "Trick or Treat" on white cardstock using Versafine Black Onyx and clear embossed. Die cut with Elizabeth Craft Designs "Stitched Circles" set. Sponged edges with the Concord.

Punched out some small 1/4" circles, added Quickie glue to the bubble circles and sprinkled with Stampendous "Crystal Snow" glitter. Used a white gel pen to add very small dots.

On the inside:

Sponged around edges with the Concord.

Electronically cut the words from white cardstock. The "Bite" word is 4.75" w. Colored while still on my mat with the Concord and the Pumpkin. Colored the drop of blood with a red marker. Adhered to inside. Added Glossy Accents to the drop of blood and Liquid Pearls "White Opal" to the teeth... then added some red Liquid Pearls to one edge of the tooth.

Stamped the bats with the black.

Final touch added red rhinestones to the "i's"