Friday, November 25, 2016

Merry Christmas Card Project and Silhouette Sale!

 
Here is a little Merry Christmas digital die cut that I've had hanging around for awhile.  I finally made it into a card! I wanted to finish it so I could show you this easy project and share information about the big Silhouette Sale.  Not only are the machines on sale, but so are all the designs in the Design Store!  That means all of my designs - over 500 of them! - are on sale.


So once you have your machine and this cutting file, here is one way you can use it!  Vinyl is perfect for preserving those fine hairlines.  It's amazing!


Supplies:
 

Instructions:

  1. Form a 7 x 4.5” tent fold card from cardstock.  Cut a 6 x 3.5” panel from the same cardstock.
  2. Cut two 6.25 x3.75” panels from gold vinyl.
  3. Cut Merry Christmas from gold vinyl: Place one piece of vinyl on the cutting mat and cut Merry Christmas - I used cutting depth 1.  Carefully “weed” out the counterspaces and excess vinyl.  Keep track of the dot on the “i”!  Cut a piece of transfer paper large enough to cover the design. Remove its release paper and place it on the vinyl Merry Christmas and rub.
  4. Lift the Merry Christmas from it’s backing and transfer to the cardstock panel.  Rub lettering onto the cardstock and carefully peel off the transfer paper.  Voila!
  5. Use double sided adhesive to assemble the card as shown!  
 
Now, I'm going to make a few more of these!  I hope this gives you some ideas for making your own cards.
Happy creating! Suzanne


Autumn Flourished - Scalloped Frame - Leaf Silhouettes - Second Spring


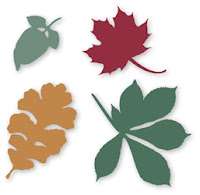
Yogi here today with a quilled autumn leaf on an easel card using a fabulous "Autumn" word. Love this one to pieces. BIG GRIN. Also using a "scalloped frame" (very handy design) and the "4 leaf silhouettes" (indispensable file...).


These are what the files look like
https://www.silhouettedesignstore.com/view-shape/159277https://www.silhouettedesignstore.com/view-shape/58368 https://www.silhouettedesignstore.com/view-shape/100444

 I'm using a quote, sentiment and design element stamp  from Quietfire Design 

("Autumn is A Second Spring..."); ("Thinking of You" 2 pce set); ("Crackle" Background")

I scored and folded my cream toned cardstock to create the easel, cutting a second piece for my front. Ran through my embossing machine using Crafts Too "Leaves". Hit the high points with Distress "Mustard Seed" and then some and Peeled Paint" using a sponge. Adhered to front of card.

I opened the Silhouette files in Sure Cuts A Lot software. Increased the width of "Autumn" to 4.5"w and cut from cream toned cardstock. Painted with Distress acrylic Dauber "Walnut Stain", dried, applied Versamark all over and embossed with Emerald Creek "Oil Rubbed Bronze" embossing powder. Adhered to front. Adhered my quilled autumn leaf - see below for how I made it...

On the floor: Opened the "Scalloped Frame" , ungrouped everything and hid all but the oval shape. Resized to fit my quote, having the oval at approx 3"w. I found the scalloped portion a bit too pronounced for my card, so resized that to 3.5"w, leaving the oval shape the same size. Painted the scallop with the walnut stain. Stamped my quote using Versafine Black Onyx and clear embossed. Sponged some "Wild Honey" around the edges, then adhered to the scallop piece. Scored approx 5/8" and adhered to floor to act as my stopper.
   
I opened the leaves and did not alter their size. Cut from the cream cardstock. Stamped with the "crackle" stamp using Versamark and clear embossed. Went direct to paper with "Fossilized Amber", "Wild Honey", "Festive Berry' and "Peeled Paint". Cleaned off the ink on the embossing then adhered to card floor.

Stamped the sentiment using the black and clear embossed.

Final touch, added some mini half pearls in each scallop and tied a narrow ribbon burgundy bow.
     

Die cut a leaf (Sizzix Bigz die "Tattered Leaves" from mat board or chipboard. You need something that gives you depth. You could also layer several regular cardstock together to create the depth.

Cut a leaf from regular cardstock and color with appropriate colors. It will be hidden, but some will peek through.

Insert into die cut mat board - DO NOT ADHERE....
I used various 1/8"w quill paper, including some "Highlights" paper which is a different color on both sides - gives a nice effect.


Cut your paper to approx 6" long and make a loose coil. Pinch on either end to create what's called a  Marquis.

Adhere to colored leaf only. As you get more coils made, you can start adhering the coils to the floor and to their sides, as long as you don't adhere it to the mat board...

When all filled in, just pop out the leaf from the mat board.

Monday, November 7, 2016

Autumn Harvest Cutting Files!

 
I'm just popping in briefly to share my latest cutting files in the Silhouette Design Store!  My Mom loved bearded wheat.  I remember it filled a vase every year in the fall. I think she developed that love during the several years we lived on the prairies.  It was certainly more beautiful than tumbleweed, although as a pre-teen, I had a certain fascination with tumbleweed!
 
In addition to these brand new files above, here are a few of the more recent Autumn files.  They're all available on the Silhouette Design Store!


Thanks for looking!  Happy cutting!
<3 my Silhouette Cameo!
Suzanne
 

Monday, October 31, 2016

Last Minute Halloween Creations!

OOOoooooooooo!  It's Halloween!  And there is still time to create fun and special little things!

Available on the Silhouette Online Store today are two more of our Halloween rings!  These are so quick and easy to make.  There are only 3 pieces to each ring and you really just need Glue Dots to hold them together.


And here are two little treat dishes.  Be careful!  You won't be able to just walk by without sampling a treat!


To those of you who saw my candy photo on Instagram and Facebook..... See?  I really did buy these for staging photographs.  And now I'll eat them.


If we're really "good", we'll have candy left over, so we'll swing into Autumn with another treat dish.  Bet you just can't have one!

 
Happy cutting!
Suzanne

Monday, October 24, 2016

Halloween Rings!

Have you seen those plastic spider rings?  I used to have a few which I would bring out every Halloween.  Something triggered that memory and I thought, well why not try making some of my own rings.  Although I didn't do a spider (I thought all those legs might be a tiny bit too flimsy!), I did a bat, a ghost and a black cat (thank you to Tiger for providing the handsome profile).  They've been available on the Silhouette store for a few hours now.
 
I don't know, these things just crack me up....!  I hope they give you a smile, too!


And continuing in the silly fun theme, you can see the Halloween rings in action on Instagram!
 

Thursday, October 20, 2016

Coffee & Friends Bendi Card - Sit Right Here By Me


Yogi here today with one of my favorite beverages... BIG GRIN - I LOVE coffee - and what could be better than just drinking coffee... but drinking it with friends.

Click on any card image to enlarge. Enjoy

This is what the cutting file looks like
https://www.silhouettedesignstore.com/view-shape/156214

And I'm using parts of a couple quote stamps from Suzanne ("Garden Bench Collection" 4pce set);  ("Find Yourself a Cup...")

Now here's what I did:
I opened the Silhouette file in Studio and resized it to 16.509 wide, which is way wider than my cardstock, so most of the right tab hung off my paper. I cut it from a deep brown textured cardstock. I then flipped it horizontally and hung everything off the mat except for the "friend" tab. I then spliced the two parts together creating a 6" w card base.

Now this is where it becomes a little tricky. I'm not that savvy when it comes to Studio software, but I need to use it to get the score lines since they don't seem to show up properly in my SCAL software - sigh!!. But now I wanted a shadow layer for the words, So opened the file in SCAL, Sized it the same as in Studio and pushed everything off the mat except the word part, cut from a cream toned cardstock, trimmed the border down and adhered to the back of my word.


Cut all the various other elements from the cream toned cardstock, including a smaller coffee bean and smaller heart. Sponged and direct to paper with Distress "Spun Sugar" for the cup and the smaller heart. Inked the steam with Versamark and embossed with Emerald Creek "Soft Fallen Snow".

Stamped the "Sit Right Here...", masking the rest of the stamp, inking with Distress "Picket Fence" and embossing with white embossing powder.


Stamped and inked the "Now Tell Me..." as above on a separate piece of the brown textured cardstock. Die cut with Elizabeth Craft Designs "Stitched Rectangles", moving the die to get the size I needed.

Adhered a pink satin ribbon to both tabs. Then adhered the "Now Tell Me..." piece using 3D foam tape.
 

Tied a multi looped fork bow from a pink variegated Sari ribbon and adhered close to the slot using a glue gun. 


Saturday, October 15, 2016

Quietfire Halloween Digital Designs Collection


Since it's that time of year, I thought I'd take the opportunity to share the Quietfire digital cutting Halloween designs!  All of these are on the Silhouette Online Store.  To see them all together and clickable for further inspection, Click Here! Then type in Halloween in the search box:


Several of them are on the Quietfire Site as svg files.  Click on each caption to go to the Quietfire site! 


I'm pretty sure there will be some new designs before Halloween 2016 rolls around, so stay tuned!  Happy Haunting!
Suzanne