Click on images to purchase
 Cut, scored and folded my cream toned cardstock to create the side folded card structure.
Placed the letters one at a time on my mat using Arial Bold font, then made sure each touched the letters next to it. Grouped and resized to the width I needed (4.5"w). Welded everything together and cut. Colored with Tombow markers. Adhered to card front.
Printed out the quote using the Arial font and cream cardstock, then cut the lines apart. Added a picot on either end and hit the edges with the red Tombow brush end. Adhered to card front.
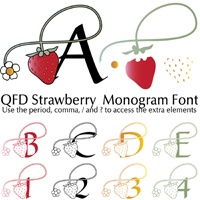
Cut a misc letter to get the strawberry sprig and then cut it apart from the letter. Or you could just cut another of the inserts, or use the .,? features of the font and weld them together.

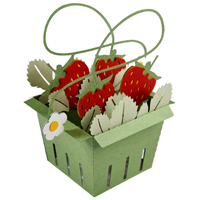
On the inside: Opened the strawberry box file and placed the elements I wanted on my mat, copying and pasting some extras. Selected all and resized till I could see one side of my box was approximately 4"w. Cut from white cardstock and while still on my mat colored the elements. I add details when off the mat.
Assembled the strawberries into the box and adhered one side to the inside of the card, making sure when I closed it nothing interfered with closing.
Cut large H & B letters and colored with markers. Adhered to inside. Printed out the rest of the words from cream cardstock, trimmed down, edged with the red Tombow and adhered to inside.
Stamped the "How Sweet It Is" onto white cardstock using Just Rite "Brayton" alphabet letters and a Versafine Clair "Tulip Red" stamp pad. Clear embossed.
Final touch added a couple more flowers to the open space on the left side...


Great card, Yogi! Strawberries are my favorite! The ones on your card are really lovely! :o)
ReplyDelete