Quietfire @ Silhouette Design Store
Monday, January 7, 2019
Assembling the Quietfire Gift Card Boxes - Tutorial
The gift card boxes come in so many designs! These sweet easy-to-assemble layered boxes have a print and cut sentiment for the top of the box (or wherever you’d like to add it), but most important, a simple pocket at the back to hold a standard size gift card.
Here are the quicky instructions for assembly:
Open the file in the software and ungroup once. Separate out the elements so similar colours may be cut at the same time. To Assemble: Fold all the perforated score lines to create the box and form the box by adhering the side tab. Glue the tabs for the bottom flap of the box in place for stability. Gently curve the panel, slide the panel inside the box and insert the tabs in the slots in the side of the box. Repeat for the second panel. Close the top and add the cut and print sentiment. Add the gift card pocket to the back.
Here are the detailed instructions in a video tutorial (If you are receiving this as an email update, please visit YouTube HERE to view the tutorial).
Just ask if you have any questions!
Happy creating! Suzanne
Playing with Quietfire QFD Monogram Fonts - Tutorials
There are so many uses for the QFD Monogram Fonts, I don't know where to start!! Cardmaking, Scrapbooking, Home Decor immediately come to mind.
If you need information on how to install fonts, check out this page on my website: https://www.quietfiredesign.ca/help-with-font-installation/
Here is a video that shows how you can easily mix and match fonts and they don't even have to be using the Silhouette software (although that is how you can best use them for home decor and wearables).
Although my Monogram Fonts aren't designed for creating text, it's fun to mix and match them to personalize a project! See the mixing and matching tutorial HERE on YouTube (use this link if you are receiving this as an email update).
NOTE: Simple matching letters for many of the QFD Monogram Fonts can be found here: http://www.quietfiredesign.ca/Basic-Caps-Monogram-Font.html
For tips on how to use the extra elements included with many of the font, watch this video!
For tips on working with the Quietfire Colour Fonts, watch this video!
Just ask if you have any questions!
Happy creating! Suzanne
Sunday, January 6, 2019
Making Quietfire Lanterns - Tutorial
I love making these lanterns! They come in several different sizes, but they are all assembled the same way. The awesome thing about them is that they can fold flat for mailing or storage till next year!
I create new ones frequently and if you need a little reminder how they are assembled, follow along below. If you're making your first lantern, check out the Assembling Quietfire Christmas Lanterns from the Silhouette Cutting Files on YouTube or click below. (If you're receiving this as an email update, please click on the link to view the video on YouTube.)
If you wish, there is a slightly shorter refresher video on YouTube HERE.
Use this lantern as a centerpiece or cut a collection of them! Use them as table decorations at each place. Add a vellum panel and fill them with flameless votives or add a tiny plant or treat – do whatever your imagination dreams of!
Here is the short version of the instructions.
- Open the file in your software. Ungroup all the elements, leaving the lantern on the mat. Cut from desired colour. If there are any on-lays, cut them from your desired colours as well.
- Cut the vellum panels if you are going to use them (don't forget to change your blade settings before - and after!)
- Place the lantern face down and fold all the perforated score lines up towards you except for the two shown.
- Adhere the vellum panels inside the lantern now if you wish to use them.
- You may add any on-lays at this point.
- Fold sides to create box, add adhesive to the tab and secure.
- To create the bottom, fold the diagonal score lines on the irregular tabs outwards. Apply adhesive to those.
- Adhere this tab to the adjacent (regular shaped tab). Repeat the same with the two remaining tabs.
- By pushing your finger up at the bottom of the box, you will now be able to fold your box flat. When it is returned to lantern shape, the floor of the lantern will “lock”. Assemble the top by sliding side tabs over the notches.
Happy creating! Suzanne
Wednesday, January 2, 2019
Snowboarder Monogram Font Scrapbook Layout
It's easy to download and install and you can use it any software that you would normally use fonts - Microsoft Word or Adobe Photoshop Elements spring immediately to mind. I could have simply printed my page title using Word, but instead I decided to try using my Silhouette Cameo electronic die cutting machine to cut out the snowboard letters to spell my son's name. It worked great. It's nice to consider both options - printing or cutting the monogram font - and whichever you choose will depend on the capabilities of your printer and your scrapbook design.
Wednesday, December 26, 2018
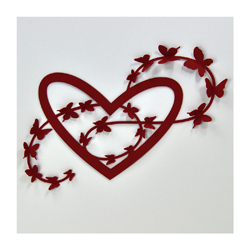
Butterfly Flourished Heart - Valentine - In A Perfect World - Easel card
I'm using a quote and sentiment stamp from Quietfire Design ("Calligraphic Love Bits" 5pce set); ("In A Perfect World..." 4pce set)
And am using a couple of Suzanne's electronic files available on Silhouette onLine store. Click images to purchase.


Scored, and folded my red textured cardstock to create my easel card structure (card size: 7"w x 5"h). Cut another piece from the red same size as card, adhered to front.

Opened SCAL (Sure Cuts A Lot software) and the Heart Butterfly Flourish file. Removed the card base image. Increased size of Heart/Butterfly to 6.7" x 4.5". Selected all and copied/pasted a 2nd image on my mat.
Opened the "Hugs" and increased size to 5"w x 1.9"H. Copied and pasted and selected "Shadow" style.
Cut everything from white cardstock. removed one of the Heart/Butterflies from the mat, cut away the butterfly flourish (keep for later) and inked the heart with Archival "Vermillion" ink pad, clear embossed. Set aside.
Colored the butterflies using Faber Castell Pitt pens and cut away from the vine.
On the other Heart/Butterfly colored the butterflies with the same colors as above. Adhered the cut away butterfly - bodies only. Using an embossing pen, inked the wings only and embossed with Emerald Creek Iridescent Shimmer embossing powder.
Adhered a piece of white "Coral Reef" paper to the card front and then the Heart Butterfly Flourish.
On the floor:
Inked the "Hugs" using Versafine "Toffee" and embossed with Queen's Gold embossing powder. Inked the shadow layer with the Vermillion and clear embossed. Adhered both layers together and inked with Versamark and clear embossed (this gives a shiny layer to the gold layer and helps adhere the two layers together. Score and adhere to floor to act as a stopper.
Stamped the "Valentine" and the quote on white cardstock using Versafine Black Onyx and clear emboss. Sponge some Distress "Fired Brick" around edges and adhere to floor.
Add some flourish pearls


