Showing posts with label cute pi. Show all posts

Friday, May 5, 2017

Periodic Table Fun

Every once in a while I poke my left brain and remind it that I used to use it all the time.  Thanks to my friend Susan, we have a Periodic Table of the Elements shower curtain (yes, just like on The Big Bang Theory!) 

It all started with Cu Te Pi....


These are just plain fun and I have to thank Design Team Member Connie Nichol for adding to the list!  I have a very dusty degree in chemistry and Connie is a working soil scientist, so her left brain is well-oiled! And this is what happens.... 


I see these as super fun designs to go on little t-shirts and onesies.  My next challenge is to research heat transfer materials so I can share some tips about making your own custom apparel.

Mother isn't available until Monday on the Silhouette site, but wouldn't that make a fun Mother's Day t-shirt for the science-type mom?  It's coming very soon! 

Oh, wait, I just had an idea for another one!  Check my Silhouette profile on Monday. (Maybe Tuesday depending on how overloaded the Silhouette staff are with new designs.)
Thanks for having a look!
Suzanne

Wednesday, March 15, 2017

Cutie Pi Scrapbook Layout

Hello, Connie Nichol here today.  It was National Pi day yesterday on March 14, so I've missed it by a day.  Oh well.


This cut file is adorable, whether you are a chemistry geek like I am, you want a pi sign for National Pi Day or you need the word 'cute' for a layout or card.  It's available in the Silhoutte Store here, or if you have a different electronic cutting machine, email Suzanne@quietfiredesign.com to purchase the file as a svg cut file.  It makes such a cute page title.
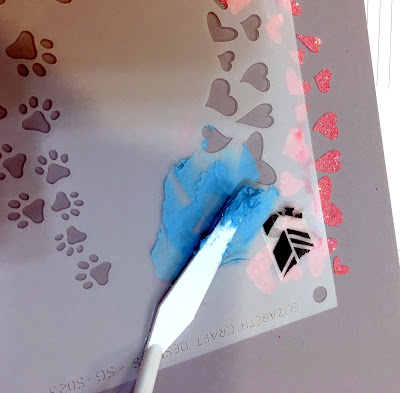
To decorate the background, I used one of the new Quietfire Design heart shaped stencil manufactured by Elizabeth Craft Design.  I mixed molding paste with a few drops of Izinks pigment ink to make blue and pink, and applied it through the stencil (dry between colours so you don't smear the existing hearts).  While the molding paste was still damp, I sprinkled with clear ultra-fine glitter to add some sparkle.


That's pretty much it.  I added small scraps of paper, lace and fabric on the left side of the photo and called it good.  I like that the focus is on the photo in this layout.  It's a small photo so it would be easy to overwhelm.  Happy Scrapbooking! 

Supplies:  Stampin Up cardstock, Ranger molding paste, Clearsnap Izink ink, Elizabeth Craft Design stencil, Silhouette Cameo, cut file by Suzanne Cannon, Brother sewing machine