Wednesday, August 28, 2019

Butterfly Heart Card

Hello, everyone!

It's Nancy here today! I'm sharing this beautiful Butterfly Heart Card file,
 that you can find in the Silhouette Design Store right HERE.

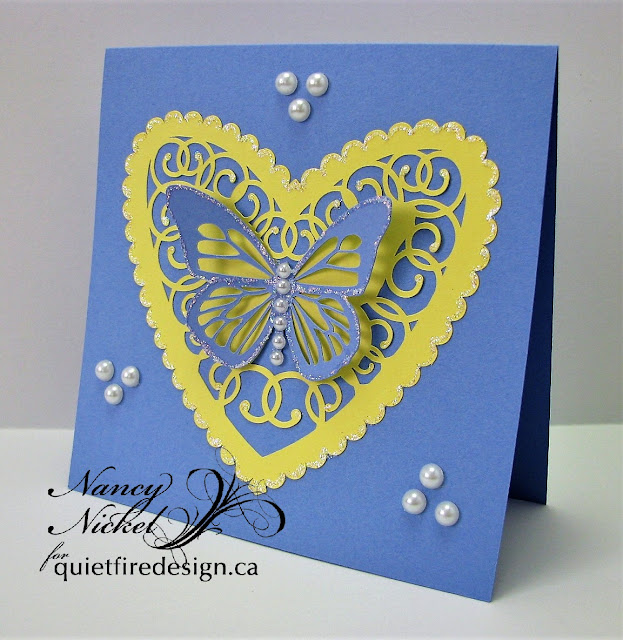
Here's the card I made using this file:


Isn't that pretty?
The file includes three pieces: the card base, the heart doily, and the butterfly.


I cut my card base out of blue cardstock, and opted to use it tent-fold fashion. 
I cut the heart doily out of a pretty yellow. It's such an intricate design but cut beautifully!
Then I cut the butterfly out of the same blue cardstock.


I adhered my heart doily to the center of the card base.
I folded up the wings of the blue butterfly before adhering the body only to butterfly outline on the heart doily.


Then I used my Stickles and added a pretty outline of glitter all around the butterfly,
as well as the heart.
I also added a row of pearls to form the butterfly body.


Finally, I added several more pearls to the card base!
This is such an elegant card that could be made in endless colour combinations.
It's also a fabulous file to use some specialty papers, such a foil and vellum!
Again, the creative possibilities are endless! :o)


Thanks so much for stopping in today! I'll be back soon with another fun project!

* * * * *

Quietfire Products Used:


Other Products Used:
American Crafts Cardstock;
Stickles - Diamond, Star Burst;
Crafts Pearls.

Wednesday, August 21, 2019

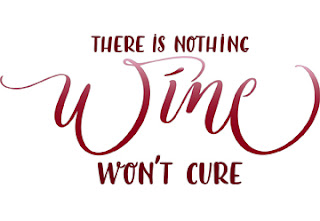
Scalloped Frame - There Is Nothing Wine Won't Cure - Wine is Sunlight - Easel


My turn on the Quietfire Digital blog and I was in a mood for some wine... and then I had some with super... BIG GRIN

I'm using a design element and quote stamp from Quietfire Design ("Wine Is Sunlight..." 4pce set).

Also using a clear sentiment "Happy Birthday Collection" from Quietfire Design also available on Elizabeth Craft Designs HERE.


And am using a couple of Suzanne's electronic files available on Silhouette onLine store, item #293004 and #297725. Click images to purchase.
Opened SCAL (Sure Cuts A Lot software) and the - Scalloped Frame. Ungrouped and broke apart to remove the 2 inner ovals, then regrouped the scalloped oval. Cut and pasted the scalloped frame and small oval to page 2 (see pic below). Used the large of the ovals and resized it to the outside dimensions of the scalloped oval. Created a shadow layer or Increased the size by 0.050
Copy this oval and paste it onto page 1 and 2.

On page 1, flip the 2nd oval and merge it slightly with the first then weld the 2 ovals. This is the basic structure for the easel. When cut, score down the center of the top oval.

Hit the card base direct to paper with Distress Oxide "Wilted Violet". 


Inked the scalloped frame with Versafine Clair "Monarch" and clear embossed twice. Adhered to card front.

 Changed the color for the word "wine" and print and cut the oval shape. Adhered to card front. 


On the floor: colored a piece of white cardstock using the oxide violet pad and clear embossed twice. Punched a bunch of circles using a 1/2" circle punch. adhered to a piece of scrap paper to hold the circles in place. Used a white gel pen to add a highlight to each circle. Stamped the leafy bit (lower portion of the "Wine is Sunlight..." quote) using Versafine Clair "Twilight" and fussy cut around the leaves and grapes. Colored with a Tombow marker and adhered to grape cluster. Folded it about a 1/3 down and adhered to floor to act as my 1st stopper.

Cut a small oval, stamped the quote with the Twilight and clear embossed. Folded it between the words and adhered to floor to act as my 2nd stopper.


Stamped the sentiment onto the floor using Versafine Clair "Purple Delight" and clear embossed. Sponged some oxide around the edges.

Final touch added some Liquid Pearls "Orchid" dots in the leafy grape cluster.


Monday, August 19, 2019

Back to school


Hello, my crafty friends!

Kora here today sharing the school cone I made for my son. It will be his very first day of school in just a few days. For this special occasion, the children are given school cones. They are made out of heavy cardstock and may be filled with a lunch box, pencils, crayons, a little toy and also some sweets. As I have a big bat lover here at home, I decided on putting some bats on the cone. As well as pencils, some stars, and his name.

All of the files are Quietfire Design Monogram Fonts. You do not need a cutting machine for those, they will work just fine with eg Word. 
Fonts I have used for this project:


After printing the desired letters & shapes, I colored the pencils and did a scan and cut.

The pencils on the mat

Bats, stars, pencils and the dragons with letters

When all is cut you can adhere it to the cone.


I added some pencils to the top


In the end, I glued the dragon letters to the cone.

Thanks so much for stopping by today!


Friday, August 16, 2019

Wednesday, August 14, 2019

Everyone needs something to believe in... Summertime ATC's- Print and Cut

Hi Y'all! 
Robyn here, in summer time and the living ...just keeps on coming!
Make it easy in your cutting creative life with these fun files from 
Suzanne.
It's quick and easy to manipulate these files from the
Everyone needs... series
into cards or home decor of any size.
Keeping it simple- Print and Cut- no weeding required!
These are my favorite- Artist Trading Cards.

On the Mat
I believe I'll have a nap
This file is
FREE WITH PURCHASE
this month in the Silhouette Store.

The working mat


The flip flop and pillow elements would make fun zipper fobs, tag embellishments and more!
You tell me- post on the
Suzanne Cannon Fan Group  Facebook Page

Tools and Supplies

Monday, August 5, 2019

Meet Twinkle, the Elephant (Gift Card Box)


Hello my friends!

I came across this sweet little elphant a while back. My cousin is going to have another baby by the end of summer, so I decided to make this gift card box for her and the baby. As we don´t know if it´s going to be a boy or a girl (surprise, surprise), I chose a neutral colour that will fit both. I decided on different shades of yellow heavy carstock, because this is a bright and cheery colour. 


After I ungrouped and cut the elements I added some embellishments to the banner, the wheels and the eye. 


When all is done you can assemble the elements. You can find a tutorial on assembeling the Quietfire gift card boxes here. There is a video tutorial online too.

the box

 the layers inside the box 


Thanks so much for stopping by! Have a great summer! Kora